2026-03-28 · Updated 2026-07-26
How to Compress JPEG Images Without Visible Quality Loss
Compress JPEG for the web the right way: match quality to what the eye sees, resize first, use progressive encoding, and avoid re-compression, with measured sizes.
Last updated: July 26, 2026
JPEG is still the most common photo format, and most JPEGs on the web are larger than they need to be. Compressing them well is not about dragging a slider to a number — it is about matching quality to what the eye can actually see at the display size, resizing first, and encoding once. This guide covers the practical settings, the tools, and the measured file sizes on one real photograph.
Quick answer: how do you compress a JPEG?
Resize it to the display size, then re-encode at quality 80–85 with progressive encoding and metadata stripped. On a typical photograph that is roughly a 70–90% size cut with no visible loss at normal viewing distance. For the smallest web result, switch to WebP or AVIF after resizing — but keep a JPEG fallback.
| Step | Why | Tool |
|---|---|---|
| Resize to display size | Biggest single byte saving | Image Resizer |
| Re-encode JPEG at q80–85 | Removes bloat, near-invisible loss | Image Compressor |
| Progressive encoding | Loads progressively, better perceived speed | optimize=True, progressive=True |
| Strip metadata | Removes EXIF/XMP bytes | -strip |
| (Optional) WebP/AVIF | Smaller still for modern browsers | Image Converter |
How does JPEG compression actually work?
JPEG divides the image into 8×8 pixel blocks, transforms each block into frequencies, then quantizes — it divides the high-frequency (fine detail) coefficients by large numbers so many round to zero. The quality slider scales that quantization matrix: lower quality means bigger divisors, more zeros, smaller file, more detail discarded. The zeros are then run-length and Huffman-coded into the final bytes.
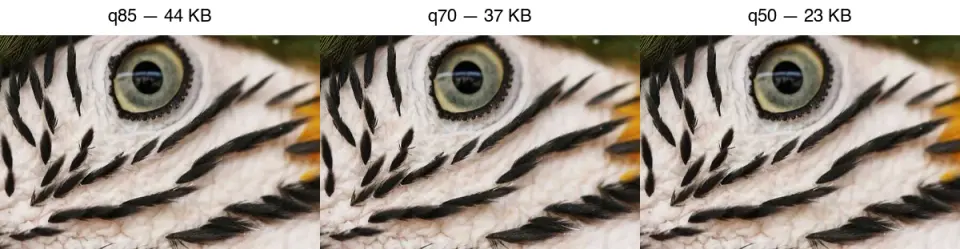
This is why JPEG blurs text and sharp edges: fine detail lives in the high-frequency coefficients that quantization zeroes out. Push quality low enough and you see 8×8 blocking artifacts, visible in the q50 panel above. For the full algorithm walkthrough, see how image compression works.
What quality setting should you use?
Compare at visible quality, not the number. JPEG q85, WebP q75, and AVIF q60 look roughly similar. Measured on one feather-detail crop, JPEG size falls steeply at first then flattens:
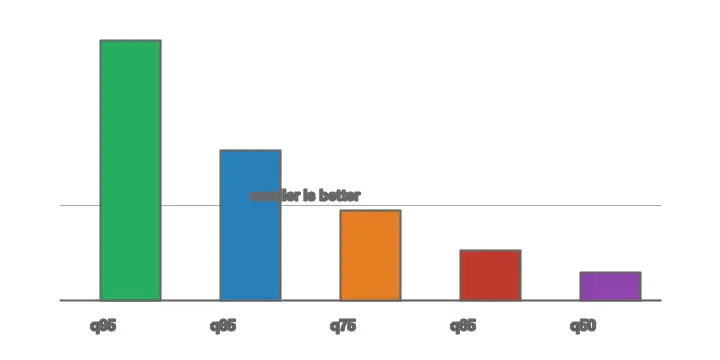
Practical bands:
| Quality | File (relative) | Visible loss | Use for |
|---|---|---|---|
| 90–95 | Largest | None | Print masters, archives |
| 80–85 | ~15–25% of original | None at viewing distance | Web photos (default) |
| 70–75 | Smaller | Minimal, in smooth areas | Thumbnails |
| 50–65 | Smallest | Visible blocking | Avoid for anything prominent |
Start at 85 and drop to 80 or 75 only if you need the bytes. Below 70 the artifacts distract.
Method 1: Browser compressor
For one image, use the Imagic AI Image Compressor: upload, resize to the display width, set JPEG quality to 85, enable progressive, and download. For live visual control, Squoosh shows the output size and a preview side by side as you move the slider.
Method 2: Command line
For a folder, the command-line encoders are fastest and scriptable.
## ImageMagick: resize, q85, progressive, strip metadata, write to out/
mkdir -p out
mogrify -path out -resize 1920x -quality 85 -strip -interlace Plane *.jpg

## jpegoptim: lossless re-optimization, or set a max quality
jpegoptim --max=85 --strip-all --all-progressive *.jpg

## mozjpeg (better compression than libjpeg at equal quality)
cjpeg -quality 85 -progressive input.ppm > output.jpg
mozjpeg produces smaller files than standard libjpeg at the same visual quality, so it is the best choice when you can install it. jpegoptim is convenient because it can re-compress in place losslessly up to a quality cap.
Method 3: Python
from PIL import Image
from pathlib import Path

def compress_jpeg(src: Path, dest: Path, quality: int = 85, max_width: int = 1920):
    with Image.open(src) as img:
        if img.mode != "RGB":
            img = img.convert("RGB")
        if img.width > max_width:
            ratio = max_width / img.width
            img = img.resize((max_width, int(img.height * ratio)), Image.LANCZOS)
        img.save(dest, "JPEG", quality=quality, optimize=True, progressive=True)

for f in Path("photos").glob("*.jpg"):
    compress_jpeg(f, Path("out") / f.name)
optimize=True builds optimal Huffman tables (smaller file, slower encode); progressive=True writes a progressive JPEG.
Should you use progressive JPEG?
Yes for above-the-fold web images. A progressive JPEG loads in coarse-to-fine passes, so the viewer sees a full-frame low-detail version almost immediately instead of a top-to-bottom wipe. Same bytes, better perceived speed. The trade-off is marginally slower encoding, which is irrelevant if you encode once at upload.
Compress or resize — which matters more?
Both reduce size, but resize first. Compression throws away detail per pixel; resizing throws away pixels you do not display. A 4000px photo compressed to q85 is still a 4000px download shown at 800px. Resizing to the display size first saves more bytes than any quality tweak, as the batch resize guide demonstrates.
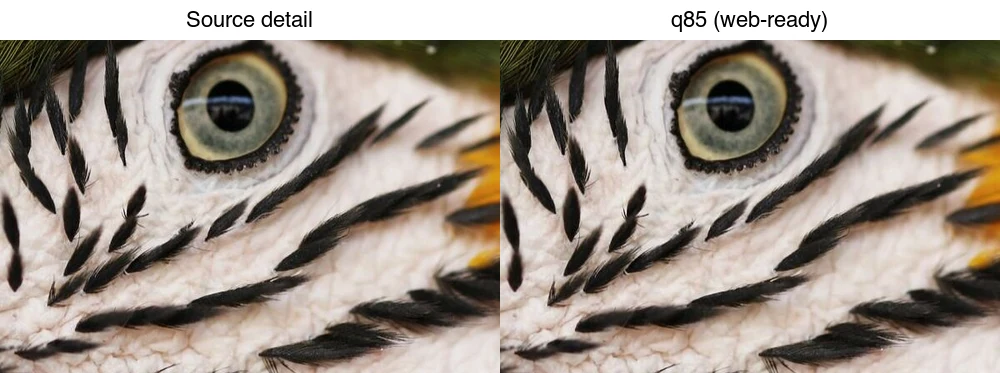
The recommended order for every image: resize to display size → compress to q85 → strip metadata → serve. For the smallest result, also export a WebP/AVIF and serve via <picture> with the JPEG as fallback.
Common mistakes
- Re-compressing an already-compressed JPEG. Each lossy encode adds artifacts; the file may even grow. Work from a master.
- Over-compressing to hit a size target. Below q70, blocking distracts. Resize smaller instead of dropping quality further.
- Saving PNG for photos. PNG is lossless and huge for photographs. Use JPEG (or WebP) for photos, PNG for graphics/text.
- Stripping EXIF you need. Keep it for photo archives; strip it for public web.
- Forgetting the format switch. WebP and AVIF are 25–50% smaller than JPEG at equal quality. See the format comparison.
Final pre-export checklist
- Resize to the display width before JPEG compression.
- Keep the original file outside the output folder.
- Use progressive JPEG for large web photos.
- Avoid re-saving the same JPEG repeatedly.
- Compare the final image at normal size and 100%.
Frequently asked questions
Does JPEG compression reduce quality?
Yes — JPEG is always lossy. But at q80–85 the loss is invisible at normal viewing distance, and the file is typically 75–90% smaller than the original.
What is the best JPEG quality for web?
80–85. It is the band where size is small and loss is not visible. Drop to 75 for thumbnails, never below 70 for anything prominent.
Can I compress an already-compressed JPEG?
You can, but savings are minimal and you add artifacts. Re-compress only from a high-quality master.
JPEG or WebP for photos?
WebP is smaller at equal quality, so prefer it for modern web pages — with a JPEG fallback in <picture>. Keep JPEG for email and old clients. The TinyPNG alternatives guide lists tools that output both.
What quality setting should I use for JPEG?
Quality 80–85 for web delivery (invisible loss at viewing size, roughly a quarter of the bytes of quality 100). Use 90–95 only for prints or crops that will be inspected closely. Below 75, banding and artifacts appear in smooth gradients like skies. Compress once at the target quality from a lossless master.
What is generation loss?
Every time you re-save a JPEG, it applies another round of lossy compression, and the artifacts compound — the image progressively loses detail and gains blocking. Avoid it by editing in a lossless format (TIFF, PNG, or RAW) and exporting JPEG once at the end. Never open, edit, and re-save a JPEG repeatedly.
Should I convert JPEG to WebP?
For web delivery, yes — WebP is 25 to 35 percent smaller at equal quality and supported in all current browsers. Keep JPEG as a fallback only for very old browsers. Serve WebP through a <picture> element with a JPEG fallback. See the WebP converter guide.
What is progressive JPEG?
A JPEG that loads in passes — a blurry full-image preview first, then progressively sharper — rather than top-to-bottom. It improves perceived load speed on slow connections, because the viewer sees the whole image early. Most encoders can write progressive JPEGs at no size cost; enable it for above-the-fold web images.
What is chroma subsampling?
A JPEG technique that stores color detail at lower resolution than brightness detail, because the eye is more sensitive to brightness than to precise color. It shrinks the file with little visible loss. Most encoders apply it by default at quality 80 and below; disable it only for art or flat-color graphics where color fidelity is critical.
Does JPEG support transparency?
No — JPEG has no alpha channel, so a transparent image gets a forced background (usually white) on JPEG export. Use PNG or WebP for transparency, and reserve JPEG for photographs. See the transparent images guide.
Image credits
- JPEG quality ladder, before/after, and size-by-quality chart — generated by the author from a macaw-feather photograph (Pexels #36720663, photo by Kaca Skok) to show real measured JPEG output across quality levels.
Use the free tools while you follow the guide.
Keep reading
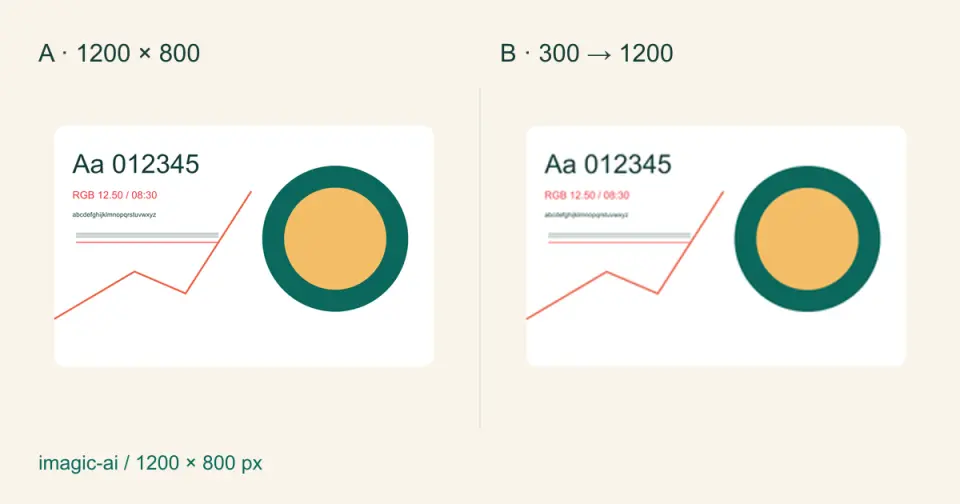
2026-09-10
Image Blurry After Export? 7 Fixes That Target the Cause
Fix an image blurry after export by checking pixels, compression and upload changes. See measured examples, PNG vs JPEG choices, and seven practical fixes.
2026-08-01
Image Compression in 2026: WebP, AVIF, JPEG XL & JPEG AI Benchmarked
I benchmarked WebP, AVIF, and JPEG XL on 4 real photos. WebP saves 32% vs JPEG, AVIF 65%, JPEG XL 30%. Full data, browser support, and which format to pick in 2026.
2026-07-26
Image Optimization Checklist: Every Step for Fast Web Images
A complete image optimization checklist: format choice, resizing, compression, responsive delivery, lazy loading, and CDN setup. Run through it before every publish.