2026-09-12 · Updated 2026-09-13
16-Bit Depth Maps: Fix Banding and Verify Your PNG
Fix stair-stepped or inverted depth maps with a reproducible 8-bit vs 16-bit PNG test, a file inspection script, and a practical Blender import checklist.
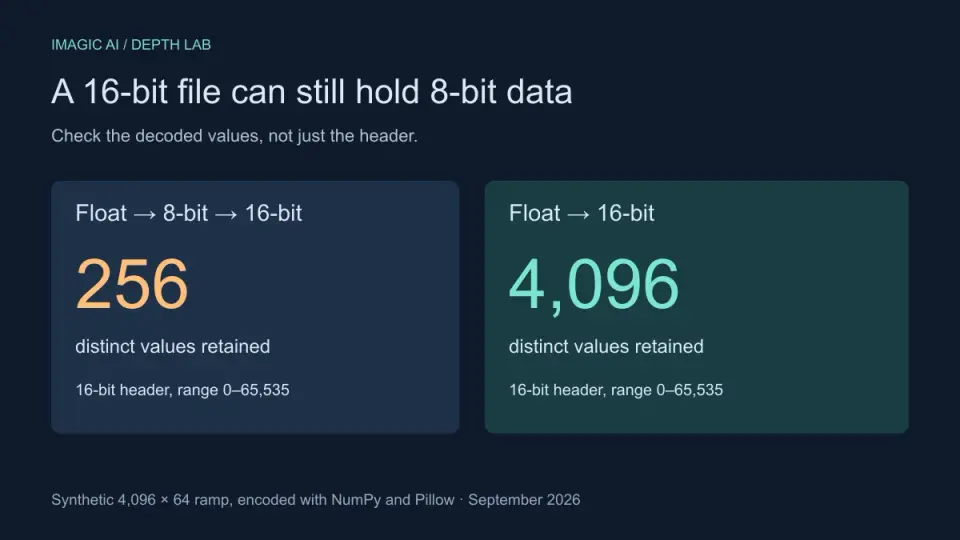
Last updated: September 13, 2026. Encoding measurements below use a synthetic ramp, not a benchmark of AI depth accuracy.
Your depth map looks smooth in a browser, but a displaced surface develops terraces. You export a “16-bit PNG,” yet nothing changes. Before generating another image or increasing mesh density, check where the values became stepped. The file extension alone cannot answer that question.
Quick answer: how do you avoid depth map banding?
Use a grayscale 16-bit PNG exported directly from the model's floating-point depth values when your next application supports it. Avoid passing the map through an 8-bit preview, screenshot, JPEG, or photo compressor. Then verify the file's sample depth, range, and distinct values before testing displacement.
A 16-bit container does not restore lost precision. In our reproducible experiment, a directly encoded 16-bit ramp retained 4,096 distinct values, while an 8-bit ramp resaved as 16-bit retained just 256. Both 16-bit files reported the same sample depth and full numeric range.
What this fixes, and what it cannot fix
This workflow addresses export precision and common import mistakes. It does not turn relative AI depth into measured distance, reveal hidden geometry, correct a mistaken silhouette, or guarantee a usable manufactured relief. A scene-depth estimate and a sculpted height field serve different purposes.
For the underlying concepts, read our depth map introduction. For an actual export, the image depth map generator defaults to 16-bit grayscale PNG, labels whether white means near or far, and offers an inversion option.
Its AI path keeps floating-point values until the final encoding step. If the tool warns that it used its edge/blur fallback instead, that fallback starts from 8-bit values, so its 16-bit PNG holds at most 256 levels.
Should you choose 8-bit, 16-bit, or floating-point depth?
| Your next task | Choose this if supported | Check before proceeding |
|---|---|---|
| Quick mask or rough preview | 8-bit grayscale PNG | Whether the effect tolerates visible value steps |
| Smooth displacement from normalized depth | Direct 16-bit grayscale PNG | That the source was not already reduced to 8-bit |
| Pipeline requiring raw floating-point values | The application's documented float format, often EXR | Units, invalid values, normalization, and import convention |
| A tool that accepts only 8-bit images | Keep a high-precision master; export an 8-bit copy | Whether its preview and final output preserve enough detail |
PNG sample depth is measured per channel, not by adding all channels together. A “32-bit” RGBA PNG stores 8 bits in each of its four channels, so a gray value copied into every channel still has only 256 possible levels. The W3C PNG specification allows grayscale sample depths of 1, 2, 4, 8, and 16 bits; PNG has no floating-point sample format.
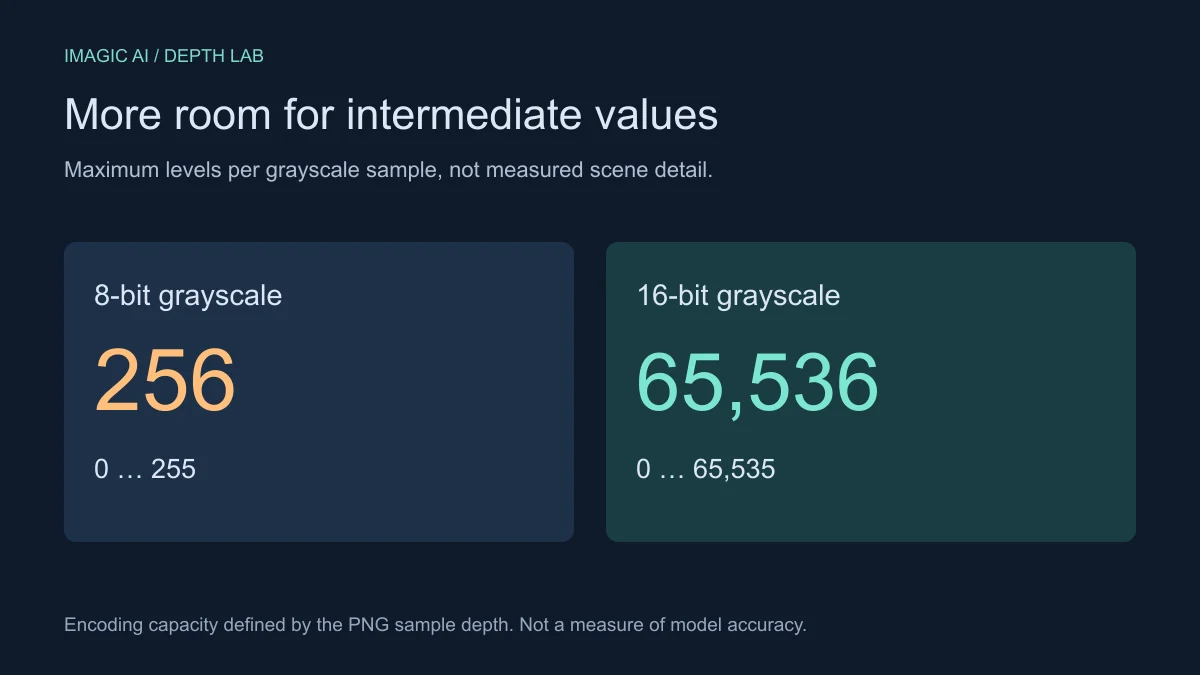
The diagram describes encoding capacity, not model accuracy or the number of values every image must contain. A constant surface can legitimately use one value. A larger file is not proof of a better estimate, either.
What did our 8-bit versus 16-bit experiment measure?
We created a 4,096 × 64 horizontal ramp with 4,096 evenly spaced values from zero to one. We encoded it three ways with NumPy and Pillow, reopened each PNG, and measured its header, distinct values, range, and largest normalized error relative to the original ramp.
| Encoding path | PNG sample depth | Distinct decoded values | Maximum normalized error | File bytes |
|---|---|---|---|---|
| Float ramp → 8-bit | 8 | 256 | 0.001953602 | 528 |
| Float ramp → 16-bit | 16 | 4,096 | 0.000007602 | 848 |
| Float ramp → 8-bit → 16-bit | 16 | 256 | 0.001953602 | 819 |
The third path multiplied each 8-bit integer by 257. That maps zero to zero and 255 to 65,535, so the range looks correct. It still cannot recreate the intermediate values lost in the first conversion. This is why checking only “16-bit” or the brightest pixel misses an important failure mode.
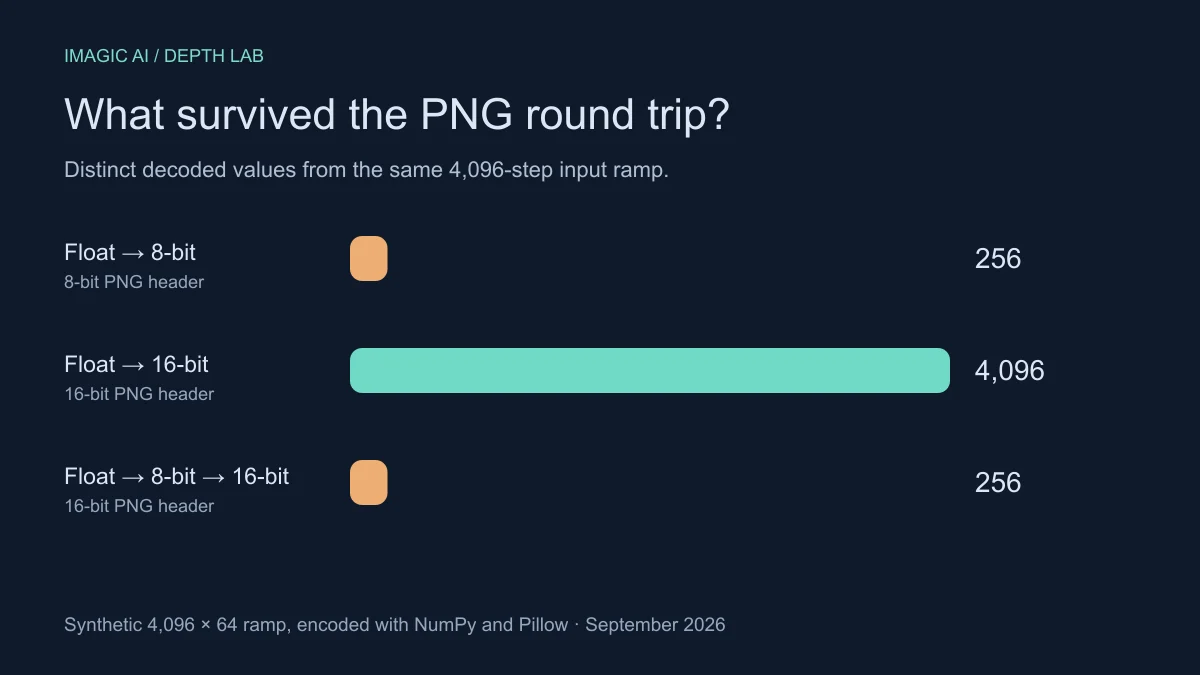
These exceptionally small files contain repeated rows and compress easily. Their byte sizes are not a prediction for photographs. The experiment isolates quantization; it does not compare depth models, test Blender renders, or measure physical engraving quality. The WebP illustrations on this page are explanatory graphics, not downloadable precision maps.
To reproduce the three files, install NumPy and Pillow in a Python environment and run:
import numpy as np
from PIL import Image

ramp = np.tile(np.linspace(0, 1, 4096), (64, 1))
a8 = np.rint(ramp * 255).astype(np.uint8)
a16 = np.rint(ramp * 65535).astype(np.uint16)
wrapped = a8.astype(np.uint16) * 257
for name, values in [("ramp-8", a8), ("ramp-16", a16),
                     ("ramp-8-in-16", wrapped)]:
    Image.fromarray(values).save(name + ".png")
How can you inspect your downloaded PNG?
Run this on the original download, before another application resaves it. It uses the same Python packages as the experiment and expects a single-channel PNG. It deliberately stops on an RGB preview instead of silently converting that preview into apparently valid depth data.
from pathlib import Path
import numpy as np
from PIL import Image

path = Path("depth.png")
raw = path.read_bytes()
assert raw[:8] == b"\x89PNG\r\n\x1a\n"
assert raw[12:16] == b"IHDR"
print("PNG sample depth:", raw[24])
print("PNG color type:", raw[25])  # 0 = grayscale
values = np.asarray(Image.open(path))
assert values.ndim == 2, "Inspect the grayscale export, not an RGB preview"
print("Range:", int(values.min()), int(values.max()))
print("Distinct values:", np.unique(values).size)
- Confirm it is the grayscale download, not the colored preview.
- Expect sample depth 16 if you requested a 16-bit export.
- Check that the numeric range suits your pipeline.
- Judge distinct values against the content; no universal threshold exists.
- Inspect a smooth slope, where plateaus are easiest to spot.
- Repeat the check after any conversion that could reduce precision.
A detailed-looking image with only 256 values deserves investigation, but this is a clue, not a verdict. A deliberately flat mask may need fewer values. Conversely, interpolation can create thousands of values from an 8-bit source without recovering the original prediction. File inspection cannot prove the entire processing history.
A nearly black preview also needs interpretation. Raw depth stored in a narrow numeric range may be valid for its intended consumer. Normalize a copy only if the next tool expects normalized depth; preserve the original and any scale metadata. For basic dimensions and format checks, our image inspection guide explains what ordinary file properties can and cannot tell you.
Why can a good file still look wrong in Blender?
Treat the map as numeric data. In the Image Texture node, set the color space to Non-Color so no display transform is applied. Connect the image to the appropriate height or displacement input, check the material's displacement method, and make sure the mesh has enough geometry for true displacement.
The Blender displacement documentation separates bump mapping, which only changes shading, from true displacement, which moves the surface and therefore needs finely subdivided geometry. Bump cannot change the silhouette. Menu placement varies by version, so follow the documentation matching your installation.
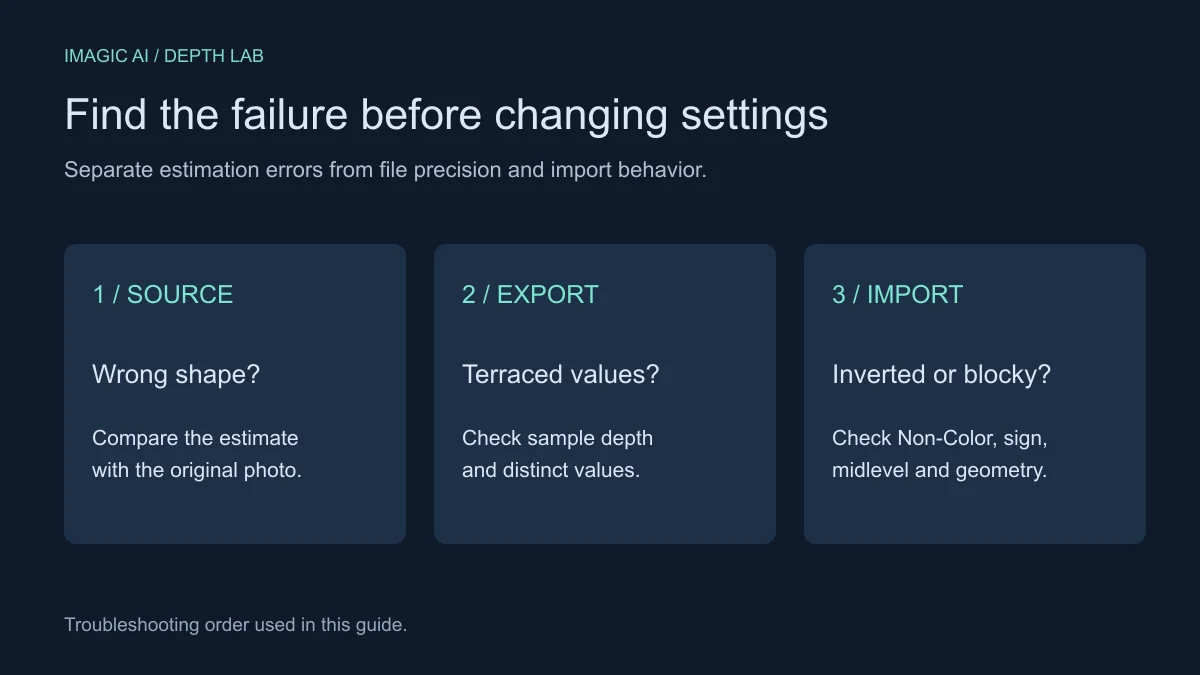
| Symptom | Investigate first | Next useful test |
|---|---|---|
| Regular terraces on a gradual slope | Quantization or an intermediate 8-bit conversion | Compare the original download with the imported file |
| A foreground subject becomes recessed | Near/far convention or displacement sign | Invert once and compare with a known foreground point |
| Blocky silhouette despite a smooth map | Insufficient geometry or incorrect displacement mode | Test more geometry on a small mesh region |
| Glass, hair, or reflections form strange shapes | The model's scene interpretation | Compare the estimate with the original photo |
| A map is almost black in a viewer | Numeric range or display handling | Inspect raw minimum and maximum before adjusting levels |
Keep the displacement scale modest while testing. Confirm the midlevel, UV mapping, crop, and aspect ratio before increasing detail. Changing all settings at once makes it difficult to identify which step caused the error.
A reliable export-to-import checklist
Before you export:
- Keep the source photo and the original depth download together.
- Choose an image with clear foreground and background separation.
- Inspect object boundaries before choosing an export format.
- Export direct 16-bit grayscale PNG for a compatible depth workflow.
- Record whether bright pixels mean near or far in this export.
After you download:
- Check the header, range, and distinct values on the saved file.
- Import it as data and verify direction against a known scene point.
- Test a small region with appropriate geometry before a full render.
- Preserve a high-precision master before any compatibility conversion.
- Save working settings so later exports can be compared consistently.
Do not route a depth master through the usual image compression workflow. A smaller display image and a reliable numeric field have different requirements. Similarly, a generic AI upscaler can invent texture that becomes unwanted geometry when interpreted as height.
If a relief or engraving application is the destination, verify its documented sample handling and grayscale direction separately. This article has not tested machine output. Camera-relative depth alone does not establish relief thickness, physical units, or processing settings.
Frequently asked questions
Does 16-bit depth make the AI estimate more accurate?
No; it can preserve finer output values, but it does not correct errors in the model's interpretation of the scene.
Can converting an 8-bit PNG to 16-bit remove banding?
Changing the container alone cannot restore lost values; smoothing may soften steps but changes the depth field.
Why does a 16-bit PNG contain only 256 distinct values?
It may have passed through an 8-bit stage, although a simple image can legitimately contain that few values.
Is white always near in a depth map?
No; conventions differ, so read the exporter's near/far label and verify it against a known foreground point.
Can I use JPEG as a displacement map?
A renderer may accept it, but its lossy image encoding makes it a poor master for preserving precise depth values.
Is a 32-bit RGBA PNG more precise than 16-bit grayscale?
Not for a grayscale depth map; “32-bit” RGBA means four 8-bit channels, so each gray value still has 256 levels unless a tool deliberately packs depth across channels.
Why does the browser preview look the same for both files?
Display conversion can hide the extra numeric precision, so inspect the original data and test it in the destination application.
Can this depth map provide exact real-world measurements?
No; a normalized relative estimate does not establish physical distances or recover unseen geometry.
Use the free tools while you follow the guide.
Keep reading
2026-07-26
Convert HEIC to JPG: Free Tools and Batch Methods Compared
Convert HEIC iPhone photos to JPG with free web, Mac, Windows, iPhone, and command-line tools, compared by speed, batch support, and where each fits.
2026-07-26
Convert JPG to PDF: Free Methods and When You Need It
Turn JPG photos into a PDF for forms, portfolios, and print. Real steps for each device, the resolution to pick, and free tools that keep quality intact.

2026-07-26
Convert PNG to JPG: When to Switch and How to Do It Right
Convert PNG to JPG to cut file size by 80 percent or more. When to keep PNG transparency, how to handle backgrounds, and batch conversion steps that preserve quality.