2026-06-28 · Updated 2026-07-10
Panorama Stitching: Merge Photos Into Wide Panoramic Images
Stitch overlapping photos into a seamless panorama. Shooting overlap, nodal-point alignment, and software fixes for seams, ghosting, and warped horizons.
Last updated: July 10, 2026
A panorama is a single wide image built from several overlapping photos. It is the way to capture a vista that no single lens can hold — a mountain range, a city skyline, a room interior — at high resolution. Panorama stitching software finds the overlapping detail between frames and blends them into one seamless image. This guide covers how to shoot frames that stitch cleanly, the projection choices that affect the result, and the common seam problems and their fixes.
Quick answer: how do you stitch a panorama?
Upload your overlapping photos to our Panorama Stitch tool to align and blend them automatically. To shoot the source photos: rotate the camera level across the scene, with each frame overlapping the previous by about a third. Load them into stitching software, let it find the control points and align the frames, choose a projection, and export. Fix any seams or ghosting manually before exporting at full resolution. Panoramas work for landscapes, interiors, and architecture — anywhere the scene is wider than one frame can capture. Resize and compress the final image for its destination.
How do you shoot photos for stitching?
The stitch is only as good as the source frames, and most stitching problems trace back to how the photos were shot. The goal is consistent framing with enough overlap for the software to find matching detail.
| Shooting factor | Recommendation | Why |
|---|---|---|
| Overlap | 25-30% per frame | Enough control points to align |
| Camera level | Use a bubble level | Keeps the horizon straight |
| Exposure | Lock it (manual mode) | Avoids brightness shifts |
| Focus | Lock it | Avoids focus drift |
| Rotation | Around the lens nodal point | Reduces parallax |
- Shoot in manual exposure so the brightness stays constant across frames.
- Lock focus and white balance for the same reason.
- Rotate level, not tilted — a tilted panorama wastes resolution when cropped straight.
- Overlap by a third so the software has plenty of detail to match.
What is parallax, and why does it break panoramas?
Parallax is the apparent shift of near objects against far objects as you change viewpoint. When you rotate a camera around its body, the lens moves in an arc, and objects at different distances shift relative to each other between frames. The stitching software cannot align them because they do not occupy the same position.
The fix is to rotate around the lens's nodal point — the optical center — so the viewpoint does not change as the camera turns. A panoramic head holds the camera at this point. For landscapes with everything far away, parallax is negligible and a normal tripod works. For interiors with objects at varying distances, a panoramic head or careful handheld rotation around the nodal point prevents the problem. The Panotools parallax guide documents the geometry in detail.
Cylindrical, spherical, or planar projection?
After alignment, the software projects the stitched image onto a flat surface, and the projection choice changes the geometry. There is no single right answer — the projection depends on the field of view.
- Planar (rectilinear) — keeps straight lines straight, but stretches the edges. Best for fields of view under 120 degrees.
- Cylindrical — wraps the image around a cylinder. Good for wide landscapes up to 360 degrees, but curves horizontal lines.
- Spherical (equirectangular) — maps the full sphere. Used for 360-degree panoramas and VR.
A common mistake is using planar projection for a very wide panorama. The edges stretch and the image looks pulled apart. Switch to cylindrical and the stretching disappears at the cost of slightly curved horizons.
Fixing seams and ghosting
Even with good shooting, the stitch can show problems. The two most common are visible seams and ghosting.
- Visible seams appear when exposure or white balance drifted between frames. Fix by normalizing exposure in the source images before stitching.
- Ghosting appears where objects moved between frames (people, cars, waves). Most software has a deghosting mode that takes the moving region from a single frame.
- Misalignment shows as double edges. Adding more control points or reshooting with more overlap fixes it.
- Warped horizon comes from an unlevel rotation. Use a level next time, or correct the geometry in software.
Run the stitch, inspect the result at 100% along the seam lines, and fix issues before exporting. A panorama that looks fine at thumbnail size can reveal seam problems at full resolution.
Choosing equipment for panoramas
The gear affects how clean the stitch comes out, but you do not need specialized equipment for most panoramas — a careful handheld or tripod technique works for landscapes.
| Setup | Best for | Trade-off |
|---|---|---|
| Handheld | Quick outdoor vistas | Parallax risk with near objects |
| Tripod | Consistent leveling | Slower, still some parallax |
| Panoramic head | Interiors, architecture | Eliminates parallax, bulky |
| Phone panorama | Casual, social | Lower quality, auto-stitch |
The phone panorama mode that most cameras offer is automated stitching in your pocket. It works well for casual wide shots but struggles with moving subjects and varying exposure. For anything you intend to print or display large, shoot individual frames on a real camera and stitch in software where you control the alignment. The field-of-view and projection reference at Cambridge in Colour explains how lens choice and projection interact, which is the detail that determines whether your final panorama looks natural or distorted.
Exporting and using the panorama
A stitched panorama is a large, unusual aspect ratio, which affects how you export and display it.
| Use case | Dimensions | Format |
|---|---|---|
| Website hero | Resize to display width | WebP |
| Full resolution | PNG or TIFF | |
| 360 viewer | 2:1 equirectangular | JPEG |
| Social crop | Crop to platform ratio | WebP |
- Panoramas compress well because of large sky and similar regions — see the compression guide.
- For web display, serve a smaller version and let users zoom; a 20000px-wide file is too heavy to load directly.
- The responsive images guide covers serving different sizes to different screens.
When is a panorama the wrong choice?
A panorama is not a substitute for a wide-angle lens. If the scene fits in a single wide frame, shoot it that way — it is simpler and avoids stitching artifacts. Reach for stitching when the scene genuinely exceeds what one lens can capture, or when you want more resolution than a single frame provides. For the HDR workflow, you can combine both techniques by bracketing each panorama frame, but that multiplies the complexity. Match the method to the scene, and a panorama becomes a tool you reach for deliberately rather than a reflex.
Frequently asked questions
How do you stitch a panorama?
Shoot overlapping photos (25–30 percent overlap) from the same position, then let stitching software find matching features across adjacent frames and blend them into one wide image. The overlap and a consistent exposure across frames are what make the seam disappear.
How do you shoot photos for stitching?
Use a tripod, rotate around the lens's nodal point (to avoid parallax), shoot in manual exposure and white balance so frames match, and overlap each frame by 25–30 percent. Inconsistent exposure or parallax breaks the stitch.
What is parallax, and why does it break panoramas?
Parallax is the apparent shift of near objects relative to far ones when you move the camera. If the camera does not rotate around its nodal point, near and far objects align differently across frames, and the stitch cannot match them — producing ghosts and seams.
Cylindrical, spherical, or planar projection?
Cylindrical for wide horizontal panoramas (keeps vertical lines straight), spherical for full 360° panoramas, planar for flat, narrower scenes. Pick by the field of view; the wrong projection distorts the edges.
Can I stitch a panorama handheld?
Poorly. Handheld shooting introduces rotation and parallax that the stitcher cannot fully correct, producing ghosting and misaligned seams. A tripod, rotating around the nodal point, is what makes a clean stitch.
Why do my panorama seams show?
Usually parallax (the camera did not rotate around its nodal point, so near and far objects aligned differently across frames) or inconsistent exposure between frames. Shoot from a tripod rotating around the nodal point, in manual exposure and white balance, with 25–30 percent overlap. The stitcher needs matching features and consistent tone to hide the seams.
Use the free tools while you follow the guide.
Keep reading
2026-09-13
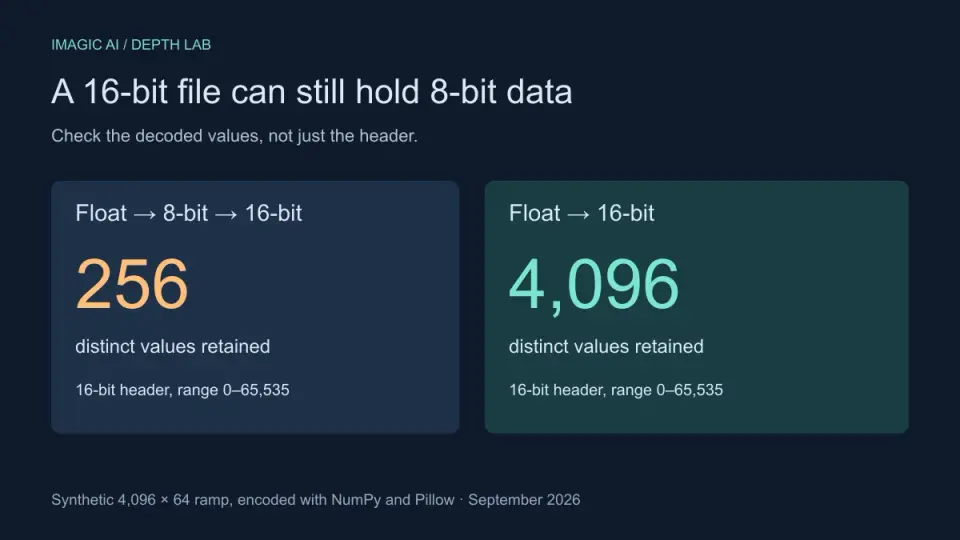
16-Bit Depth Maps: Fix Banding and Verify Your PNG
Fix stair-stepped or inverted depth maps with a reproducible 8-bit vs 16-bit PNG test, a file inspection script, and a practical Blender import checklist.
2026-09-13
GIF Maker From Images: Build Animated GIFs That Load Fast
Turn a set of images into an animated GIF for web and social media. Real frame timing, size limits for each platform, and when to choose GIF over video.

2026-09-13
Screenshot to Image: Save, Format, and Optimize Screenshots
Capture screenshots on any device, save them in the right format, and compress them for web without blurring text. Real steps for PNG, WebP, and full-page capture.