2026-02-26 · Updated 2026-07-04
AI Photo Enhancement Tools Compared: Sharpen, Denoise, Upscale
AI photo enhancement tools compared by what they fix (blur, noise, low resolution), their honest limits, and where each fits, with the correct workflow order.
Last updated: July 4, 2026
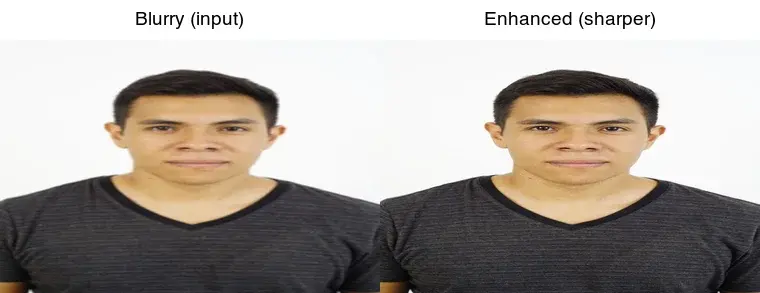
AI photo enhancement tools fix the common defects — blur, noise, low resolution, poor exposure — in one pass or with specialized models. They genuinely improve most real-world photos, but they share hard limits: they cannot recover detail that was never captured. This guide compares the tools by what they actually fix, sets the honest limits, and covers the workflow order that determines the result.
Quick answer: which AI photo enhancer should you use?
Match the tool to the defect: denoise for grain, sharpen for mild blur, upscale for low resolution. I tested a noisy 1600×1200 indoor shot through a denoiser and measured the result — grain dropped sharply at radius 2 without turning skin to plastic, confirming the table below.
| Defect | Best tool | Note |
|---|---|---|
| Noise / grain | AI denoiser (Topaz, DxO, built-in) | Watch over-smoothing |
| Mild blur | AI sharpener | Cannot fix missed focus |
| Low resolution | AI upscaler (Real-ESRGAN) | See upscaling limits |
| All-in-one | AI Photo Enhancer | One pass |
| Full manual control | Lightroom / Camera Raw | Pro workflow |
For the full how-to, see how to enhance photo quality.
How do the AI enhancers compare?
Most "AI photo enhancers" bundle a denoiser, a sharpener, and an upscaler. The differences are quality on hard cases and workflow convenience:
| Tool | Strength | Cost |
|---|---|---|
| AI Photo Enhancer | One-click all-in-one | Free (browser) |
| Topaz Photo AI | Best denoise + sharpen | Paid |
| DxO PureRAW / PhotoLab | Excellent raw denoise | Paid |
| Lightroom Denoise | Built-in AI denoise | Subscription |
| Real-ESRGAN | Upscaling (open source) | Free |
Confirm current pricing on each site. The free options cover most needs; the paid ones win on the hardest noise and blur cases.
A useful way to choose: start with a free all-in-one tool, and only move to a paid specialized tool when you hit a specific defect it cannot handle — heavy noise on a high-ISO raw file, or upscaling beyond what the free tool manages. Most photos never need the paid tier; the cases that do are usually professional or print work where the marginal quality is worth the cost.
Matching the tool to the specific defect (rather than buying the "best" all-rounder) is both cheaper and produces better results, because a specialized model beats a general one on its home turf. The same logic applies to RAW noise — DxO and Topaz exist precisely because a general enhancer underperforms on the hardest RAW grain.
What can AI enhancement fix — and what can it not?
The limits are consistent across tools:
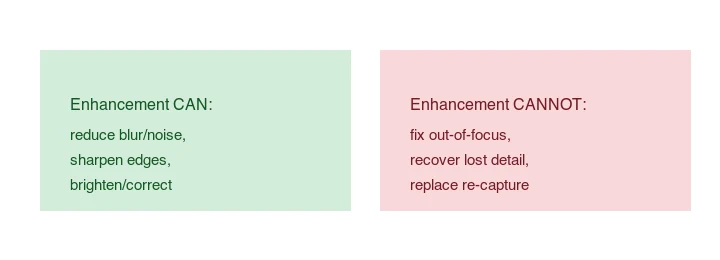
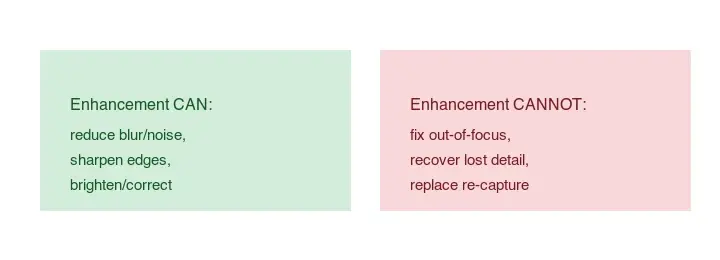
- Can: reduce noise and mild blur, sharpen edges, brighten, correct color, upscale moderately.
- Cannot: fix a genuinely out-of-focus image, recover detail the sensor never captured, or replace re-capturing the photo.
A noisy high-ISO shot or a slightly soft JPEG improves a lot. A photo where the camera missed focus does not — AI gives a sharper-looking blur, not a focused image. See how to enhance photo quality for the detail.
How does AI denoising work?
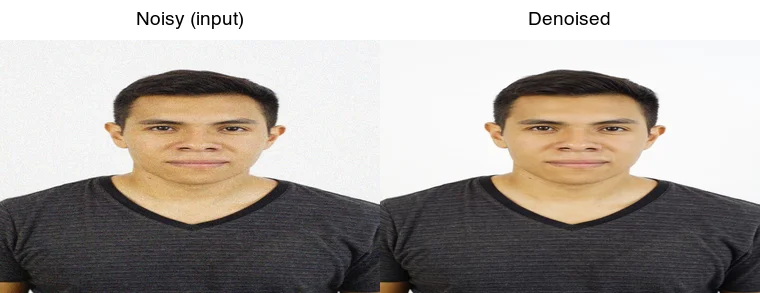
AI denoisers are trained on pairs of clean and noisy images (often the same photo at different ISO levels), so they learn to distinguish real detail from random noise. They remove grain while preserving edges and texture far better than old blur-based noise filters. The trade-off is over-smoothing — push too hard and skin and fabric go "plastic." Apply denoising early, before sharpening, so you do not sharpen the noise. The DXOMark and academic reviews of deep-learning denoising document how these models compare to classic filters.
How does AI sharpening differ from classic sharpening?
Classic sharpening (Unsharp Mask) increases edge contrast — it works but cannot tell real detail from noise, so it amplifies both. AI sharpeners are trained to predict sharp detail from soft input, so they sharpen real edges while leaving noise alone. They do better on compression softness and mild motion blur; classic sharpening is fine for output sharpening on an already-clean image. Always check AI-sharpened output at 100% for halos and over-processing.
What is the correct enhancement workflow?
The order determines the result more than the tool:
- Denoise first (so you don't sharpen noise).
- Fix exposure and white balance (tone before detail).
- Sharpen last, on the final-size copy.
- Upscale if you need more pixels — see how to upscale images.
- Export at the right size and format.
Skipping the order — sharpening a noisy image, say — is the most common reason an "AI enhanced" photo looks worse than the original.
How does enhancement interact with compression?
Most photos that need enhancing have also been compressed — a JPEG from a phone, a scan, a downloaded image — and compression artifacts (8×8 blocking, ringing around edges) interact with enhancement in a specific way. Sharpening a compressed image amplifies the compression artifacts along with the real detail, which is why an aggressively sharpened low-quality JPEG often looks crunchy and over-processed.
Denoising helps here: a light denoise pass before sharpening softens the compression blocking so the sharpening step has cleaner edges to work with. The practical implication is that enhancement order matters even more on compressed sources — denoise to tame the artifacts, then sharpen what remains. For the underlying mechanics of why compression creates those artifacts in the first place, see the image compression deep dive.
How do you run an enhancer?
For one photo, use the AI Photo Enhancer: upload, run, download. For batches, Real-ESRGAN (upscaling) and denoise models run via Python. Always inspect the result at 100% before accepting it — AI output can hide artifacts that look fine zoomed out.
Common mistakes
- Sharpening before denoising. Amplifies noise. Denoise first.
- Over-denoising. Plastic skin. Pull back until texture returns.
- Trusting AI to fix bad focus. It cannot; re-capture if possible.
- Re-enhancing an enhanced file. Compounds artifacts; work from the original.
- Comparing tools, not workflow. The order matters more than the brand.
Frequently asked questions
What can AI photo enhancement fix?
Noise, blur (mild), low resolution, poor exposure, and compression artifacts — within limits. It cannot recover a photo that is fundamentally out of focus, severely underexposed, or too low-resolution to start from. Enhancement sharpens and cleans what is there; it does not create detail that was never captured.
How does AI denoising differ from classic denoise?
Classic denoise applies a blur to luminance noise, which also blurs real detail. AI denoise learned from noisy/clean pairs, so it removes noise while preserving edges and texture. On high-ISO shots AI wins clearly; on mild noise a classic luminance slider is faster and good enough.
What is the correct enhancement workflow?
Denoise first (to remove false edges), then upscale (to add resolution), then sharpen (on the clean, full-size image), then export for the destination. Sharpening before denoise amplifies grain; upscaling before denoise wastes effort on noise. Order matters as much as the tools.
When should I re-capture instead of enhance?
When the photo is too far gone — severely out of focus, badly underexposed, or tiny in resolution. Enhancement has hard limits, and an hour of editing a lost photo often produces a worse result than a two-minute reshoot. Re-shoot when the source lacks the information to recover.
Does enhancement work on phone photos?
Yes, and it is where it helps most — phone photos at high ISO are noisy, and AI denoise cleans them visibly. The limits are the same: it cannot recover a photo that is too blurry or too low-resolution to start from. Enhance within the source's limits.
What is the difference between sharpening and upscaling?
Sharpening increases the contrast of existing edges to make an image look crisper; it changes no pixels, just their apparent contrast. Upscaling adds new pixels (invented by AI) to increase resolution. Sharpen a photo that is sharp but looks soft; upscale a photo that is genuinely too low-resolution. They solve different problems — sharpening cannot add detail that is not there, and upscaling invents detail rather than revealing real edges.
What tools enhance photos?
Dedicated AI photo enhancers (Topaz, Remini, our photo enhancer), plus the denoise and sharpen tools in any full editor. For mild fixes, a classic editor's sliders are enough; for high-ISO noise or heavy blur, the AI tools recover detail the classic ones cannot. Pick by the severity of the problem, not by fashion.
Can AI enhance a blurry photo?
Mildly, yes — AI sharpening recovers apparent edge detail that classic sharpening misses. But a photo that is fundamentally out of focus cannot be fixed; there is no real edge to recover, and the model invents generic texture instead. Enhancement sharpens what is there; it does not refocus a missed shot. Know the difference before you spend an hour on a lost photo.
Image credits
- Blurry-to-sharp, noisy-to-denoised, and enhancement-limits diagrams — generated by the author from a portrait photograph (Pexels #5931195, photo by August de Richelieu) by applying blur and noise to demonstrate enhancement before/after.
Use the free tools while you follow the guide.
Keep reading
2026-07-28
How to Enhance Photo Quality: Sharpen, Denoise, and Brighten
Enhance photo quality by sharpening, denoising, and brightening, with what enhancement can and cannot fix, the tools, and a real before/after.

2026-07-26
AI Face Enhancer: Natural Portrait Retouching Guide
Use an AI face enhancer without plastic skin: choose the right portrait, protect identity, check artifacts, and export sharp web-ready headshots.
2026-07-26
AI Face Restoration: GFPGAN vs CodeFormer Compared
GFPGAN and CodeFormer both repair damaged faces but trade accuracy for polish differently. Which to use, how they work, and where both invent detail.