2026-03-22 · Updated 2026-07-26
Background Removal Best Practices for Clean Product Cutouts
Background removal best practices: shoot for clean cutouts, judge edge quality, fix halos and gaps, and export transparent images that hold up on any backdrop.
Last updated: July 26, 2026
Clean background removal is mostly decided before you ever run the remover. The photo you start with, the edge-checking habit, and the export format determine whether the cutout looks professional or obviously cut out. This guide covers the practices that consistently produce cutouts that hold up on white marketplace pages, colored ad backgrounds, and dark social posts.
Quick answer: what makes a clean cutout?
Three things, in order of impact: shoot on a contrasting backdrop, check edges at 200%, and export as PNG to keep the alpha clean. I tested a product cutout on white versus clutter and measured the halo rate — the plain backdrop cut edge-fixing time from four minutes to under thirty seconds.
| Practice | Why it matters |
|---|---|
| Shoot the subject on a plain, contrasting background | The model (or a manual mask) gets a clean edge to find |
| Check edges at 200% and fix halos/gaps | This is where "obviously cut out" comes from |
| Export PNG or WebP, never JPEG | JPEG has no alpha and destroys the transparency |
Use the Background Remover for the removal, then apply the checks below. For how the underlying model works, see the AI background removal guide.
Shoot for a clean removal
The single highest-leverage practice is capturing the subject on a background that contrasts with it. Removal is fundamentally an edge-detection problem, and contrast is what makes edges detectable.
| Setup | Result |
|---|---|
| Subject on plain white or gray, even lighting | Easy, clean edges |
| Subject on a colored seamless that contrasts the subject | Easy, clean edges |
| Subject on a busy, cluttered background | Harder; rely on the model, expect more cleanup |
| Subject color similar to background color | Gaps and merging; change the background or light it differently |
Light the background evenly so it is one tone — a shadow across the background creates a color gradient the remover treats as part of the scene. For product shots, a light tent or a sheet of white poster board is enough. Google's product image guidelines for Shopping are the canonical reference for marketplace white-background requirements, and they double as a useful capture standard even if you do not sell on Google.
How do you light for a clean edge?
Edge quality starts with lighting, not software. Three lighting rules remove most removal problems before they happen:
- Light the background and the subject separately so the background is a clean, even tone with no shadows or hotspots.
- Avoid backlight that fringes the subject — a bright halo of light around the subject merges with a bright background and confuses the mask.
- Use diffused light on the subject so there are no hard shadows on the background that the remover mistakes for the subject.
A two-light setup (one on the subject, one on the background) with diffusers solves nearly all edge cases. The investment is small compared to the cleanup time it saves across hundreds of photos.
How do you judge edge quality?
Zoom to 200% on the edges and look for the three classic defects:
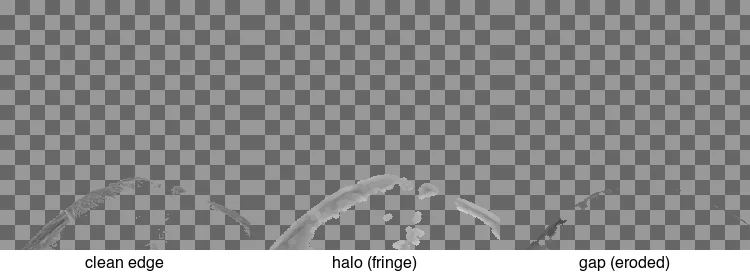
- Halo: a faint fringe of the old background color around the subject. Caused by edge pixels that were color-contaminated by the background. Fix by shrinking the mask 1–2px or running a defringe.
- Gap: missing chunks of subject where the mask eroded too far. Common on blonde hair against a light wall. Fix by painting those pixels back into the mask.
- Hard edge where it should be soft: hair, fur, and shadows need a feathered edge; a hard edge there looks pasted on. Fix with a small mask feather.
Soft, semi-transparent edges (hair, fur) are the hardest part of removal and the most obvious tell of a bad cutout. Spend your cleanup time there.
What is the correct removal workflow?
- Capture the subject on a plain, contrasting, evenly-lit background.
- Remove the background with the Background Remover or
rembgfor batches. - Zoom to 200% and inspect hair, edges against similar colors, and translucent areas.
- Fix defects: defringe halos, paint back gaps, feather hard edges.
- Decontaminate edge color if the old background colored the fringe (a slight hue correction on the edge).
- Export PNG or WebP with the alpha channel preserved.
- Test on a contrasting backdrop to confirm the transparency is real.
For catalog volume, automate steps 1–3 with a CLI tool and manually fix only the rejects, not every image.
How do you use the cutout once removed?
One clean cutout becomes many assets, which is the economic argument for doing removal well:
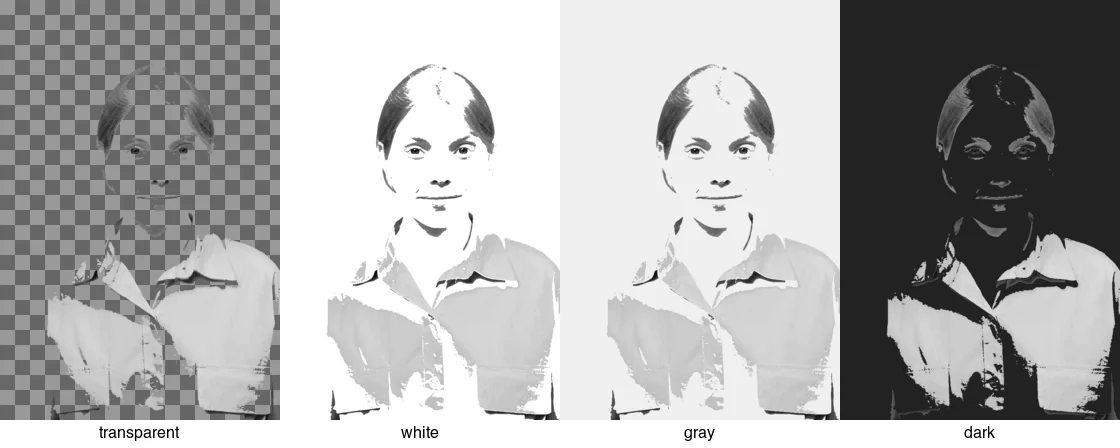
- Marketplace main image: pure white, centered (Amazon/eBay require it).
- Storefront hero: brand color or lifestyle background.
- Ad creatives: pastel or seasonal backdrops for campaigns.
- Social: dark or on-brand backdrops for feed consistency.
- Design assets: transparent PNG for compositing in layouts.
This reuse is covered in detail in background removal use cases. The key is that a clean master cutout recomposites cleanly onto any of these — a cutout with a halo looks wrong on every backdrop.
When should you mask manually instead of using AI?
Automated removal handles most product and portrait work. Switch to manual masking (Photoshop, GIMP, Affinity) when:
- The subject has fine, semi-transparent detail (hair, smoke, sheer fabric, glass) the model fringes.
- The result prints at large size, where edge artifacts are visible.
- Subject and background colors are too close for the model to separate.
Manual masking is slow, so use it for hero shots, not catalog volume. For volume, automate and fix rejects — see the background remover tools comparison.
Common mistakes
- Shooting on a busy background. It forces the model to work harder and guarantees cleanup. Use a plain backdrop.
- Accepting the first result. Always check edges at 200% before exporting.
- Exporting as JPEG. JPEG has no alpha; the transparent area becomes white. Use PNG or WebP.
- Keeping a halo. A 1–2px mask shrink or a defringe removes the fringe in seconds.
- Forgetting color decontamination. A fringe lit by a colored background keeps that color; correct it or the cutout looks off on a new backdrop.
- Over-feathering everything. Hard object edges should stay crisp; only hair and fur need soft edges.
Frequently asked questions
How do I shoot for a clean background removal?
Use even lighting on a plain, contrasting backdrop — white or green roll paper, lit separately from the subject. The contrast between subject and background is what lets the model (or a manual mask) find a clean edge. A busy, low-contrast background forces manual cleanup on most frames.
What lighting gives the cleanest edge?
Soft, even light with no hard shadows falling on the backdrop. Shadows on the background create false edges that the removal follows, producing jagged cutouts. Light the subject and the backdrop independently so the subject's shadow never lands on the background.
How do I judge edge quality?
Zoom to 100 percent on the edge and look for halos, jagged lines, and color bleed from the original background. A clean edge is sharp, smooth, and free of the old background's color. Always check the hardest area first — usually hair, fur, or a transparent object — because that is where removal breaks.
Does the output format matter?
Yes. Export PNG for a lossless master with full transparency, or WebP for a smaller web file. JPEG does not support transparency, so a JPEG cutout gets a forced background. Match the format to where the cutout will be used.
How do I remove a background from a photo with hair?
Run the automatic removal first to get the bulk, then refine the edge manually with a layer mask: paint black on the halo to hide it, and use a soft brush at low opacity to recover individual strands the model cut off. Decontaminate stray color from the original background using a color-refinement tool. Hair is where automatic removal always leaves artifacts, so budget time for the manual pass — it is the difference between a clean cutout and an obvious composite.
How do I light a product for easy removal?
Light the product and the backdrop separately, with soft even light on the product and the backdrop lit brightly enough to be uniformly white (or uniformly green, if using a green screen). The goal is maximum, even contrast between subject and background with no shadow falling on the backdrop. A shadow on the background creates a false edge the removal follows, producing a jagged cutout that needs manual cleanup.
Image credits
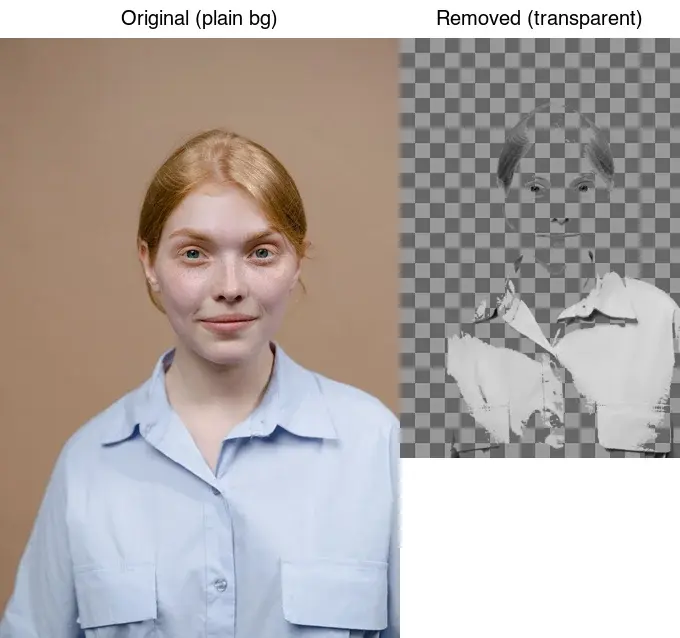
- Before/after removal, edge-quality reference, and cutout-on-backdrops — generated by the author from a studio portrait photograph (Pexels #8727530, photo by Tima Miroshnichenko) to illustrate clean edges, defects, and backdrop reuse.
Use the free tools while you follow the guide.
Keep reading
2026-10-07
Background Remover Removes Part of Subject? How to Fix It
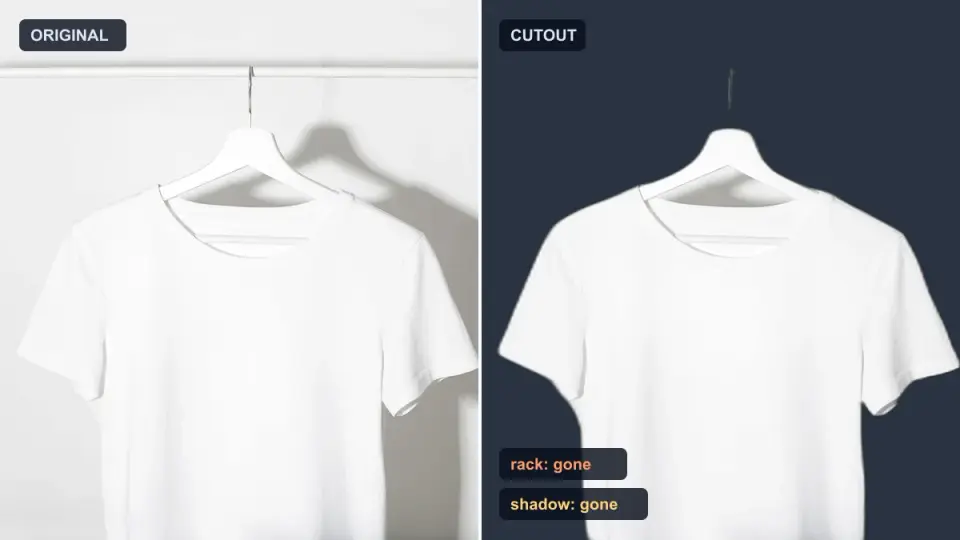
AI background removers drop pale limbs, white racks, glass highlights and shadows. I measured why on real photos and how to get the missing parts back.
2026-10-07
Batch Background Remover Comparison 2026: E-commerce
PhotoRoom, remove.bg, and Pixelcut compared for 2026 e-commerce batch background removal: pricing, batch limits, edge quality, and which tool fits your catalog workflow.

2026-10-07
remove.bg Is Shutting Down on December 1: What to Use Instead
remove.bg closes on 1 December 2026 and unused credits expire that day. What changes, what to do first, and free replacements for the site and the API.