2026-03-26 · Updated 2026-07-26
Bulk Image Resizer: Resize Hundreds of Images at Once (Free)
Resize hundreds of images in bulk for free with a browser tool, ImageMagick, XnConvert, or a Python script, with real byte savings and the safe batch workflow.
Last updated: July 26, 2026
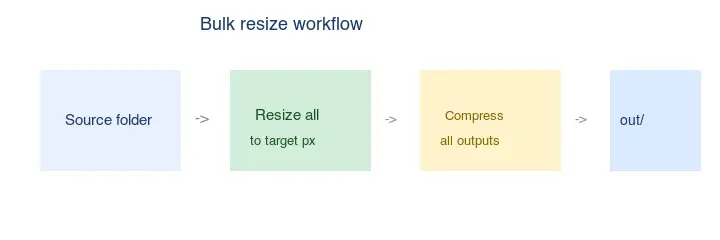
A bulk image resizer processes a whole folder of images to one target size in a single pass — the only practical way to handle hundreds of photos. The workflow is simple and the same regardless of tool: point it at a source folder, set a target width, write the outputs to a separate folder (so originals stay safe), and let it run. This guide covers the free tools, the real byte savings, and the safe batch workflow.
Quick answer: which bulk resizer should you use?
| Situation | Tool | Why |
|---|---|---|
| One-off, a few images | Image Resizer | Browser, no install |
| Recurring, command line | ImageMagick mogrify |
Fast, scriptable, no upload |
| Recurring, GUI, any OS | XnConvert | Visual actions, unlimited |
| Automated pipeline | Python + Pillow | Full control |
For the full how-to including preset sizes, see how to batch resize images.
Why resize in bulk?
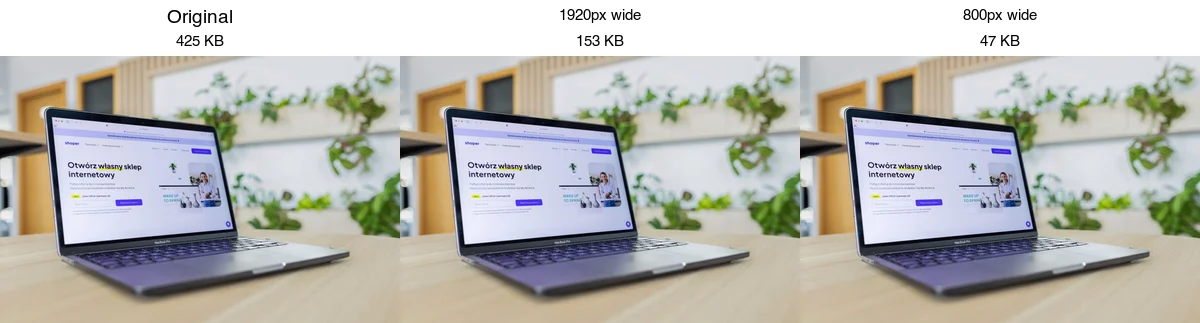
Resizing one image is a few clicks; resizing a thousand by hand takes a day. Bulk resizing runs the same operation on every file in a folder, which is the only sensible approach for a product shoot, a photo export, or a website migration. The payoff is large because resizing to the display size is the single biggest byte saving available — bigger than any compression setting.
How much does bulk resize save?
Measured on one photo, resizing to the display size removes most of the bytes:
| Size | Bytes | Vs original |
|---|---|---|
| Original (large) | ~100% | baseline |
| Compress only | ~70% | −30% |
| Resize + compress | ~15% | −85% |
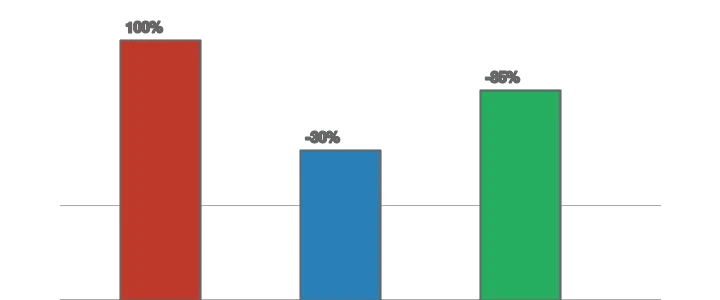
Across a folder of hundreds, that is the difference between a multi-gigabyte image set and a few hundred megabytes. Always resize before compressing — see how to compress JPEG.
Method 1: Browser bulk resizer
For a handful of images, use the Image Resizer: select multiple files, set the target width, keep the aspect ratio, and download the batch. Best for one-off jobs where installing software is overkill. Browser tools meter work, so for dozens or hundreds of images switch to a desktop or command-line method.
Method 2: ImageMagick mogrify (command line)
ImageMagick is free, cross-platform, and the fastest way to resize thousands of images. The key command is mogrify, which operates in place — so always point it at an output folder.
## Resize every JPG to 1920px wide (aspect ratio kept), write to resized/
mogrify -path resized -resize 1920x *.jpg

## Parallelize for speed on a large folder
mkdir -p out
ls *.jpg | xargs -P 4 -I {} convert {} -resize 1920x out/{}
On a modern laptop a thousand typical photos finish in under a minute. See how to batch resize for the full option set.
Method 3: XnConvert (visual desktop app)
XnConvert is a free GUI batch processor for Windows, macOS, and Linux. Add a folder (no count limit), add a Resize action (by pixels, percentage, or longest side), add more actions (compress, convert format, rename), set an output folder, and run. It records your action stack, so a repeat job is one click. Good middle ground between a browser tool and a script.
Method 4: Python (Pillow)
For a build step or server, Python with Pillow gives full control. It is the right choice when bulk resizing is part of a larger pipeline — a CI build that optimizes images on deploy, a server that processes uploads, or an asset-generation step — because it integrates with the rest of your code and can read its target size from a config file or a database.
from pathlib import Path
from PIL import Image

input_dir = Path("images")
output_dir = Path("resized")
output_dir.mkdir(exist_ok=True)
target_width = 1920

for img_path in input_dir.glob("*"):
    if img_path.suffix.lower() not in (".jpg", ".jpeg", ".png", ".webp"):
        continue
    with Image.open(img_path) as img:
        if img.width > target_width:
            ratio = target_width / img.width
            img = img.resize((target_width, int(img.height * ratio)), Image.LANCZOS)
        img.save(output_dir / img_path.name)
Use Image.LANCZOS for downscaling quality, and skip images already smaller than the target to avoid upscaling blur. For very large folders, wrap the loop in concurrent.futures.ThreadPoolExecutor to process several images in parallel and cut wall-clock time.
How do you handle mixed orientations and sizes?
A real folder rarely contains uniformly-sized images — there are portraits, landscapes, and squares mixed together, and a naive "resize to 1920px wide" leaves portraits much smaller than landscapes.
The robust approach is to resize by the longest edge rather than the width, so every image ends up at the same maximum dimension regardless of orientation. In ImageMagick that is -resize 1920x1920> (the > means "only shrink, and fit within the box"). In Pillow, compare width and height and resize by whichever is larger. This produces a consistent set where no single dimension exceeds your target, which is what most CMS and storefront systems actually expect. For strict uniformity (every output exactly the same box), crop to the target aspect ratio first, then resize — covered in how to batch resize.
Bulk resize best practices
- Always write to a separate output folder. Never batch-resize in place without a backup — it overwrites originals irreversibly.
- Preserve aspect ratio. Resize by one dimension; let the other follow. Forcing both distorts.
- Test on one image first. Run a single file, inspect, then batch the rest.
- Only resize down. Skip files already at or below the target width.
- Resize before compressing. Resize to display size, then compress the outputs.
- Keep a master folder. Store full-resolution originals separately.
Common problems
| Symptom | Cause | Fix |
|---|---|---|
| Output blurry | Upscaled | Skip files at/below target width |
| Stretched | Forced exact dimensions | Drop the !, use -resize WIDTHx |
| Files still large | Resized but not compressed | Add a compress/quality step |
| Originals overwritten | Ran mogrify in place |
Use -path out; restore from backup |
| Some files error | Unsupported/corrupt format | Log and skip |
Final pre-export checklist
- Copy originals to a separate folder before resizing.
- Pick one longest-edge target for each destination.
- Keep aspect ratio locked unless the platform demands a crop.
- Resize first, then compress or convert formats.
- Spot-check the smallest and largest source images before publishing.
Frequently asked questions
Is there a free bulk image resizer?
Yes — ImageMagick (command line), XnConvert (GUI), and the Image Resizer (browser) are all free.
How do I resize a whole folder at once?
With ImageMagick: mogrify -path out -resize 1920x *.jpg. With XnConvert: add the folder, add a Resize action, run.
Can I bulk-resize and compress in one step?
Yes — add the compress/quality step to the same batch. With mogrify: mogrify -path out -resize 1920x -quality 80 *.jpg.
Should I resize before or after compressing?
Resize first. Resizing to the display size saves more bytes than any quality setting.
How many images can a bulk resizer handle?
A browser tool handles 50 to 200 files per run before the tab gets heavy on memory; a command-line tool like ImageMagick mogrify handles thousands without that ceiling. For large catalogs, the command line is the safer, faster call. Test on a 10-image subset first so a wrong setting is caught before it touches the whole folder.
Does bulk resizing keep quality?
Yes, when downscaling with a good resampling filter (Lanczos). Quality loss comes from re-compressing or from upscaling, not from resizing itself. Always write to a new folder and keep the originals so any size can be re-exported. Resize from a high-quality master; do not resize an already-compressed JPEG and re-save it, which compounds artifacts.
What is the fastest bulk-resize method?
The command line. ImageMagick mogrify resizes a whole folder in one command and handles thousands where a browser tool hits a memory ceiling around 200 files. For repeatable jobs, save the command; for one-off folders, a browser tool is fine but slower at scale.
Does bulk resizing handle different aspect ratios?
Only if you tell it to. A bulk resize that sets only width preserves each image's aspect ratio (good for mixed-orientation folders); one that sets both width and height stretches images that do not match (bad). For a mixed folder, resize by the longest edge or by width with height auto, so each image keeps its proportions.
Does bulk resizing keep EXIF metadata?
Usually yes, unless you explicitly strip it. Most resize tools preserve EXIF (camera, date, settings) by default, which is fine for archives but adds weight to web files. If you are resizing for the web, strip the metadata in the same step to save bytes — cameras embed thumbnails, GPS, and settings data the viewer never needs. Strip after resizing, never before, so you keep the master's full information.
Image credits
- Bulk-resize workflow, resize-size comparison, and resize-vs-compress diagrams — generated by the author from an ecommerce-style photograph (Pexels #16675632, photo by Mikael Blomkvist) to show real bulk-resize byte savings.
Use the free tools while you follow the guide.
Keep reading
2026-07-26
How to Batch Resize Images: Free Tools and Scripts Compared
Resize hundreds of images at once with free online tools, ImageMagick, XnConvert, and Python scripts. Copy-paste commands, preset sizes, and a practical workflow.
2026-07-26
How to Crop an Image to a Circle (Profile Photos and Avatars)
Crop an image to a circle for avatars and profile photos: the square-first rule, making a transparent circle PNG or a circle on a background, and where circles are used.
2026-07-26
How to Resize an Image Without Losing Quality
Resize an image without losing quality: keep the aspect ratio, only resize down, pick the right resampling filter, and resize before compressing, with real sizes.