2026-03-01 · Updated 2026-07-26
AI Image Colorizer Tools: Colorize Old Photos (With Limits)
Free AI image colorizer tools compared, how to colorize black-and-white photos, the real before/after, and the honest limits — color is guessed, not recovered.
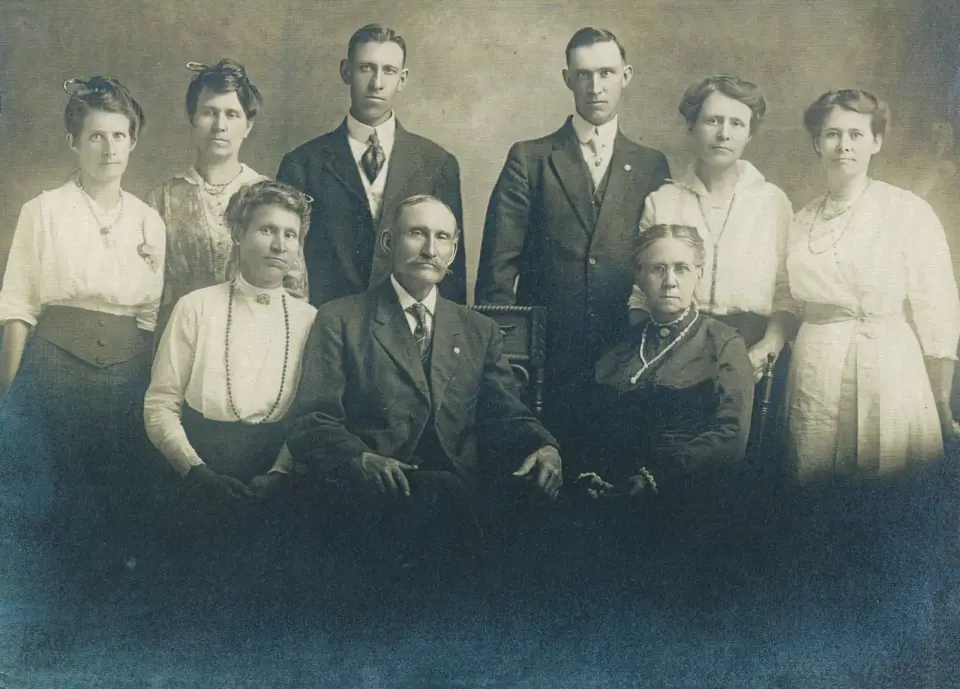
Last updated: July 26, 2026
An AI image colorizer turns a black-and-white photo into a color version by predicting plausible colors from learned patterns. The tools are easy to use and the results look convincing, but every tool shares the same hard limit: the color is guessed, not recovered, because black-and-white film never recorded it. This guide compares the tools and sets the expectation you need before trusting the output.
Quick answer: which colorizer should you use?
| Situation | Tool | Why |
|---|---|---|
| One photo, no install | AI Colorizer | Browser, instant |
| Batches / control | DeOldify (open source) | Scriptable, local |
| Family photos | MyHeritage | Tuned for portraits |
| Pro editing | Photoshop Neural Filters | Inside an existing workflow |
For how the technology works and its limits, see the AI image colorization guide.
How do the colorizers compare?
Output quality varies by image more than by tool, so this table covers checkable features:
| Tool | Type | Cost | Best for |
|---|---|---|---|
| AI Colorizer | Browser | Free | One-off |
| DeOldify | Open source | Free | Batches |
| MyHeritage | Service | Freemium | Family/portrait |
| Photoshop Neural Filters | Plugin | Paid (Photoshop) | Pro workflow |
Every tool guesses colors rather than recovering them — the difference is convenience, control, and tuning for a content type (portraits, landscapes). A useful way to think about it: the model's job is to produce a believable color image fast; your job is to verify and correct the specific objects whose real color you know. No tool removes that verification step, so do not pick a tool expecting it to be authoritative — pick it for the workflow it fits. Browser tools win on speed, DeOldify wins on control and batching, and the service/plugin options win when you want tuning for faces or integration into an existing editor.
How does colorization actually work?
A model trained on color photos (converted to grayscale as input) learns the grayscale-to-color patterns, then predicts a color version of a new black-and-white image.
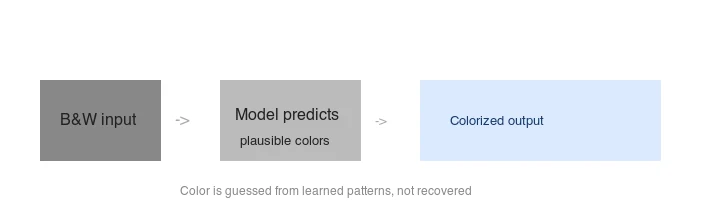 model predicts plausible colors -> colorized output">
The color is synthesized from learned associations (sky is often blue, grass green, skin a narrow tone range), not measured from the scene. The DeOldify project documents the model and its Artistic versus Stable variants.
What can a colorizer do — and not do?
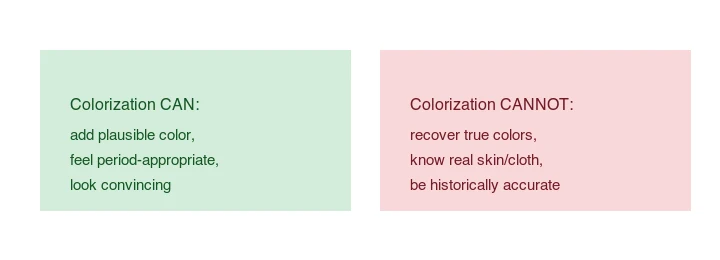
- Can: add convincing, period-appropriate color; make old photos feel alive.
- Cannot: recover true colors; know if a dress was red or blue; be historically accurate.
A colorized historical photo is an interpretation, not a factual color record. For the deeper explanation, see the AI image colorization guide.
Method 1: Browser colorizer
For one photo, use the AI Colorizer: upload the black-and-white image, run, and download. No install, works on any device with a browser. Check the result at 100% for wrong object colors before using it, because browser tools give you no control over the model's choices.
Method 2: DeOldify (batch / control)
DeOldify is the leading open-source model, runnable locally and scriptable for batches. It offers an Artistic model (more vivid, less stable) and a Stable model (more conservative) — pick by whether you want punch or reliability. See the project README for setup; it runs in a Python environment and exposes both model variants as options.
Method 3: MyHeritage / Photoshop
MyHeritage is tuned for family portraits and old photos and is convenient but freemium, so it fits when you want portrait-optimized results without running a model yourself. Photoshop's Neural Filters colorizer sits inside a pro editing workflow, useful if you already use Photoshop and want to manually correct the result afterward.
Should you colorize historical photos?
This is worth pausing on, because colorization sits at the edge of restoration and fabrication. For personal and family photos — a grandparent's wartime portrait, a childhood snapshot — colorization is a harmless and often moving way to make the past feel closer. The colors are invented, but no one is relying on them as a factual record, and the emotional value is real.
For published historical, journalistic, or documentary photos, the calculus is different. A colorized version of a famous historical photograph can spread as if it were the original color, misleading viewers about what was actually recorded. The responsible practice in that context is to clearly label a colorized image as an interpretation and to keep the black-and-white original as the authoritative version. Some archives and publications refuse to publish colorized historical photos at all for this reason. The technology is the same in both cases; the difference is the audience's expectation and the consequence of being wrong about the colors. If in doubt, label it, and let the viewer decide whether to trust the color.
This ties into the broader principle that runs through AI image editing: the tool's output is a plausible suggestion, and the human's job is to verify and contextualize it. That is just as true for colorization as it is for upscaling (see how to upscale images) or background removal (see background removal best practices).
How do you get the best result?
- Restore the source first. Remove dust and scratches and improve contrast before colorizing — a clean scan colors better.
- Pick the right model. Stable for reliability, Artistic for vivid.
- Check at 100%. Look for wrong object colors and bleeding.
- Manually fix known colors. Correct objects whose true color you know (a car, a uniform).
- Label it as colorized. Do not present a colorized historical photo as the original color.
For source restoration, see how to upscale images.
What are the common failure modes?
- Wrong object colors — a car or garment comes out an arbitrary color.
- Flat skin tones — some models under-saturate faces.
- Color bleeding — color leaks across low-contrast boundaries.
- Sequence flicker — colorizing video frames one-by-one flickers; video needs temporal consistency (see AI video colorization).
Frequently asked questions
Which AI colorizer should I use?
A browser colorizer for one-off photos (fast, no setup), or DeOldify for batch control and reproducibility. The browser tools are easier; DeOldify gives you model and strength settings so you can tune the result. Pick by whether you need speed or control.
How accurate is AI colorization?
It is a plausible guess, not a recovery. The model assigns colors based on training, so common subjects (sky, grass, skin) come out natural, but specific colors (a particular dress, a brand) are unknowable from grayscale. Keep the original scan as the source of truth and treat the colorized version as an interpretation.
Can I colorize a video?
Yes, but video is harder than photos because colors must stay consistent across frames. AI video colorization uses temporal tracking to keep a shirt the same color shot to shot; without it, colors flicker. See the video colorization guide.
What makes a colorization look fake?
Over-saturation, uniform color, and flat skin tones. Real old photos have faded, muted color; cranking saturation to make them "pop" reads as artificial. Pull the colorization layer's opacity down and add slight grain to sell the analog look.
Can I colorize a damaged photo?
Repair the damage first, then colorize. A model run on a scratched, torn scan produces colorization built on missing information, which reads as muddy or wrong. Fix tears and clean the scan, then colorize the restored version for a coherent result.
How do I make colorization look authentic?
Pull the colorization layer's opacity down to 70 or 80 percent so the original luminance shows through, add slight grain to mimic aged film, and avoid over-saturation — real old color photos are muted, not vivid. A common mistake is cranking saturation to make the result "pop," which reads as artificial. The goal is a plausible, slightly faded look, not a modern vibrant photo. Compare against real color photos from the era if you have a reference, and match their restrained palette.
What photos colorize best?
High-contrast, sharp scans with clear subjects and distinct textures. Faded, low-contrast, or damaged scans produce muddy colorization because the model has weak cues to work from. Restore and clean the scan before colorizing — repair scratches, fix contrast — or the result disappoints regardless of how good the model is. The source quality caps the colorization.
How do I choose a colorizer?
Pick by control needs. A browser colorizer is fastest for one-off photos and needs no setup. DeOldify, run locally or via a notebook, gives you model and strength settings so you can tune the result and reproduce it — useful when you are colorizing a series and want consistency. For a single family photo, the browser tool is enough; for a batch or a project, the scriptable tool wins because you can apply the same settings across every image.
Image credits
- Colorize before/after, how-colorization-works, and colorization-limits diagrams — generated by the author from a landscape photograph (Pexels #1287145, photo by eberhard grossgasteiger) by desaturating to black-and-white to demonstrate the colorization input/output.
Use the free tools while you follow the guide.
Keep reading
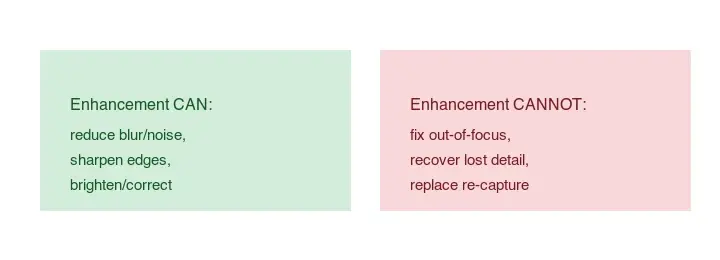
2026-07-28
How to Enhance Photo Quality: Sharpen, Denoise, and Brighten
Enhance photo quality by sharpening, denoising, and brightening, with what enhancement can and cannot fix, the tools, and a real before/after.

2026-07-26
AI Face Enhancer: Natural Portrait Retouching Guide
Use an AI face enhancer without plastic skin: choose the right portrait, protect identity, check artifacts, and export sharp web-ready headshots.
2026-07-26
AI Face Restoration: GFPGAN vs CodeFormer Compared
GFPGAN and CodeFormer both repair damaged faces but trade accuracy for polish differently. Which to use, how they work, and where both invent detail.