2026-03-01 · Updated 2026-07-12
10 Best Free Image Tools: Which One Should You Use?
Compare 10 free image tools for editing, resizing, compression, background removal, design, and exports, with a practical workflow.
Last updated: July 12, 2026
Free image tools are good enough for a surprising amount of daily work now, but they are not interchangeable. A store owner fixing product photos needs a different tool than a designer opening a PSD, and a developer compressing hero images has different risks than a social media manager resizing ten posts.
Update, October 2026: remove.bg, mentioned below, is closing. Its standalone site and self-serve API stop on 1 December 2026, and unused credits expire that day. See what to use instead.
This guide ranks the best free image tools by the job they handle best, then shows how to combine them without damaging the final file.
Quick answer: what is the best free image tool?
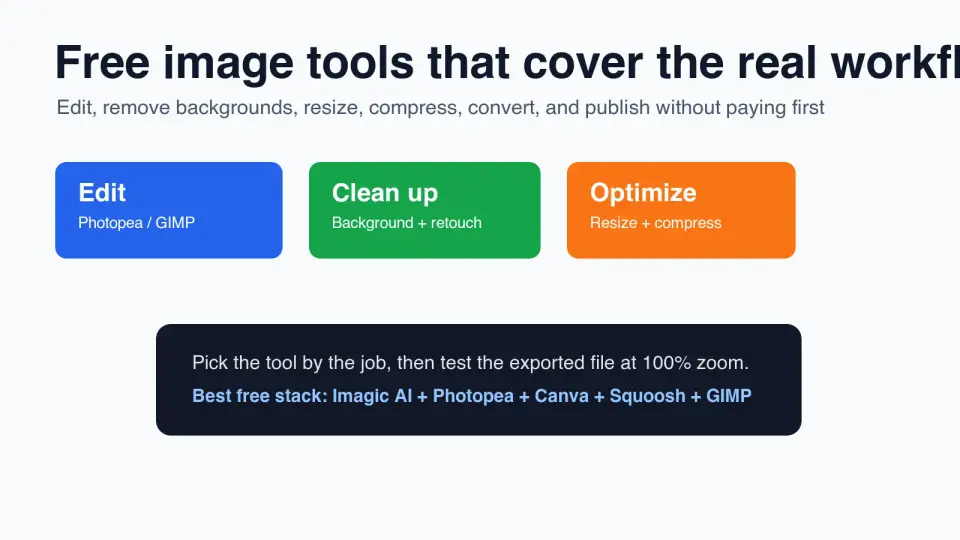
For most people, the best free image tool is a small stack: Imagic AI for quick browser tasks, Photopea for layered editing, Canva Free for social graphics, Squoosh or TinyPNG for compression, and GIMP when you need a desktop editor.
If you only want one starting point, use Imagic AI for simple web image work: resize, crop, compress, convert, upscale, and remove backgrounds. Move to Photopea or GIMP when the job needs layers, masks, brushes, or a PSD file.
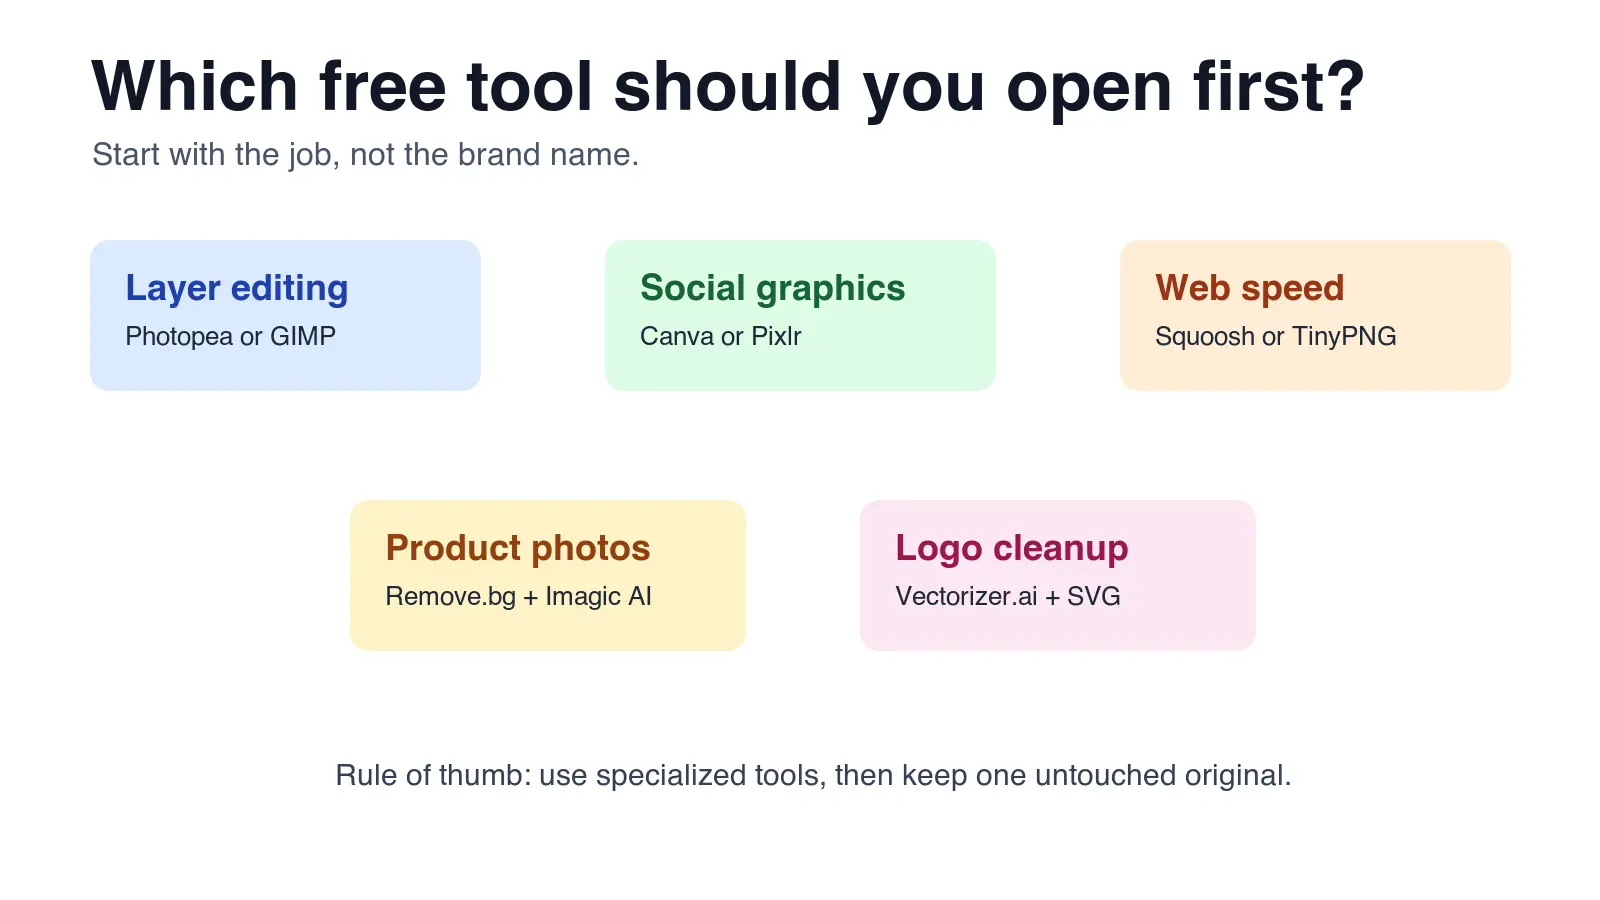
| If you need to... | Open this first | Why |
|---|---|---|
| Resize, crop, compress, or convert one image | Imagic AI | Fast browser workflow with common image utilities in one place |
| Edit PSDs, masks, and layers online | Photopea | Photoshop-like interface without installing desktop software |
| Make social posts, thumbnails, or simple banners | Canva Free | Templates and text layouts are faster than manual design |
| Compress for a website | Squoosh or TinyPNG | Clear preview of quality versus file size |
| Do advanced retouching offline | GIMP | Full desktop editor with brushes, selections, masks, and plugins |
The most practical rule: use the simplest tool that preserves enough control. Free tools save money, but they still cost time if you pick one that hides export settings or locks the feature you actually need.
How should you choose a free image tool?
Start with the destination. A marketplace listing, blog hero, Instagram carousel, passport photo, logo cleanup, and email attachment all have different size, format, and quality constraints.
I tested this list against five everyday jobs: product-photo cleanup, blog-image optimization, social post design, PSD editing, and quick format conversion. The score below is not a lab benchmark; it is a practical fit check based on whether the free workflow gets a usable export without forcing an upgrade at the last step.
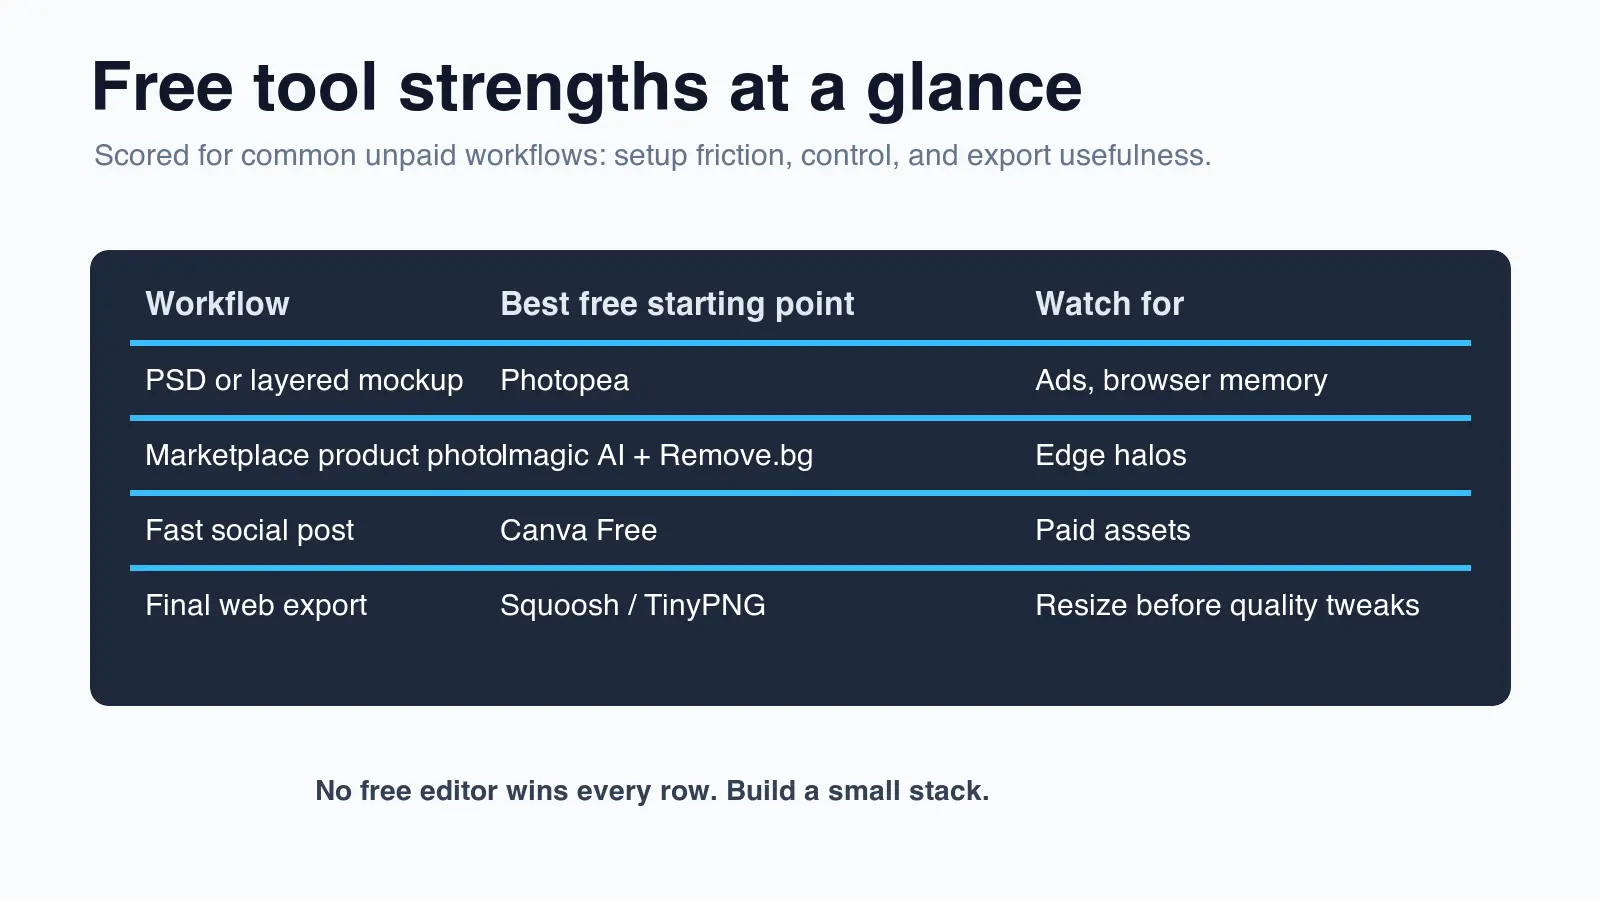
| Tool | Best free use | Main limit to check |
|---|---|---|
| Imagic AI | Quick resize, crop, compression, conversion, upscaling, background cleanup | Complex layer editing belongs elsewhere |
| Photopea | PSD and layered browser editing | Ads and large files can slow older computers |
| Canva Free | Social graphics and marketing templates | Some assets, exports, and brand features are paid |
| GIMP | Advanced offline editing | Slower learning curve than template tools |
| Squoosh | Web compression and format testing | Single-image workflow; no layout tools |
| TinyPNG | Fast PNG, JPEG, and WebP compression | Batch and size limits can matter |
| Remove.bg | Background removal | High-resolution and batch work may require credits |
| Pixlr | Lightweight browser edits | Advanced controls vary by plan |
| Fotor | Portrait touch-ups and one-click enhancements | Many AI features are gated |
| Vectorizer.ai | Raster logo to SVG-style vector output | Works best on simple, clean graphics |
Before choosing, answer these checks:
- Do you need layers or only a final flat image?
- Does the tool export the required format: JPEG, PNG, WebP, AVIF, SVG, or PDF?
- Can you set exact pixel dimensions?
- Can you preview quality at 100% zoom?
- Will the free plan add a watermark or reduce resolution?
- Are you allowed to upload this image to a third-party service?
Those last two checks prevent most bad surprises. Free design tools often look generous until the export button reveals a watermark, a paid asset, or a lower resolution than the destination requires.
The 10 best free image tools in 2026
1. Imagic AI
Use Imagic AI when the job is a small production task, not a full design session. It is strongest for resizing, cropping, compressing, converting, upscaling, and background removal. That makes it useful for ecommerce sellers, bloggers, and marketers who need the final image ready for upload.
Good fits:
- Compress a product photo before uploading it to a shop.
- Convert a PNG screenshot to WebP for a blog.
- Crop a square image for a profile or product card.
- Remove a simple background before placing the subject on white.
Related next steps: use the image compression deep dive to understand quality settings, then use the batch resize guide if you are processing many files.
2. Photopea
Photopea is the best free browser option when someone sends you a PSD, layered mockup, or file that needs masks and adjustment layers. It feels closer to Photoshop than most web editors, which is useful if you already know that workflow.
It is less ideal for a beginner who only wants a quick crop. The interface has more panels, shortcuts, and controls than a template tool. That power is the point, but it also means the first five minutes can feel heavy.
3. Canva Free
Canva Free is strongest when the image is part of a layout: social graphics, thumbnails, simple ads, posters, and presentation images. The free plan gives you templates, type combinations, basic photo editing, and quick exports.
Check the asset labels before you publish. A design can mix free and paid elements, and the paid parts may not be obvious until export. For recurring brand work, keep a small set of approved free templates instead of rebuilding from scratch each week.
4. GIMP
GIMP is the free desktop editor to use when browser tools feel too cramped. It handles selections, masks, layers, retouching, brushes, plugins, and local file workflows. It is also useful when privacy rules prevent uploading images to a web service.
The trade-off is setup and learning time. GIMP is not the fastest tool for a single resize, but it is dependable when you need precise local control.
5. Squoosh
Squoosh is a focused image optimizer. It is especially useful because you can compare the original and compressed image before saving. For web work, that preview is worth more than a vague "high quality" export button.
Use it to test WebP, AVIF, JPEG, and resize settings on representative images. Then apply the winning settings in your normal production pipeline. The MDN image format reference is the right place to confirm browser format behavior before you standardize on one format.
6. TinyPNG
TinyPNG remains one of the quickest ways to shrink PNG, JPEG, and WebP images without opening a full editor. It is best for people who already have final images and only need smaller files.
It is not a design tool. Resize first, then compress. If you compress a 4000px file and display it at 800px, you still shipped too many pixels. See the TinyPNG alternatives comparison if you need batch behavior, API options, or format control.
7. Remove.bg
Remove.bg is useful when the job is only background removal. It is fast on portraits and product photos with a clear subject. For marketplace images, check the edges at full size before publishing; hair, glass, fur, and shadows can still need cleanup.
Google's Merchant Center image guidance expects clear product imagery and warns against overlays that distract from the product. Their product image specification is a useful quality checklist even outside Google Shopping.
8. Pixlr
Pixlr is a good lightweight browser editor for quick changes: crop, text, overlays, effects, and small social images. It sits between Canva and Photopea. You get more editing control than a template tool, with less complexity than a PSD editor.
Use it when the image needs a few visual edits but not a full layer-heavy workflow.
9. Fotor
Fotor is strongest for quick enhancement, portraits, and template-assisted edits. It is a reasonable choice for sellers who need a cleaner listing image but do not want to learn masks and curves.
Be careful with one-click enhancement. It can improve a dull image, but it can also make skin, fabric, or product colors look unrealistic. For ecommerce, compare the edited version against the original before publishing.
10. Vectorizer.ai
Vectorizer.ai is useful when you need to turn a simple raster logo, icon, or flat illustration into a scalable vector-style file. It works best on clean shapes with strong edges.
Do not expect it to rescue a detailed photograph. Vector output is for graphics, labels, icons, and simple artwork. If the source has shadows, gradients, or texture, simplify it first.
Which free tools are best for web images?
For web images, the winning workflow is resize first, then compress, then choose the format. Format choice matters, but it cannot fix an oversized source file.
Google's guidance on optimizing images for Core Web Vitals focuses on serving the right image dimensions and reducing bytes. That is the part free tools can handle well if you use them in the right order.
Use this order:
- Crop the image to the actual composition.
- Resize to the largest display size you need.
- Compress and compare quality at 100% zoom.
- Convert to WebP or AVIF when the destination supports it.
- Keep JPEG or PNG when email, legacy systems, or transparency requirements demand it.
- Save the untouched original in a separate folder.
For format decisions, use the AVIF vs WebP comparison and the convert image format guide. For transparent images and cutouts, use the background removal best practices guide before you publish.
What should you check before trusting a free editor?
A free editor is only useful if the export survives the real destination. A beautiful preview inside the tool does not guarantee that the uploaded file will pass a marketplace, CMS, email client, or social platform.
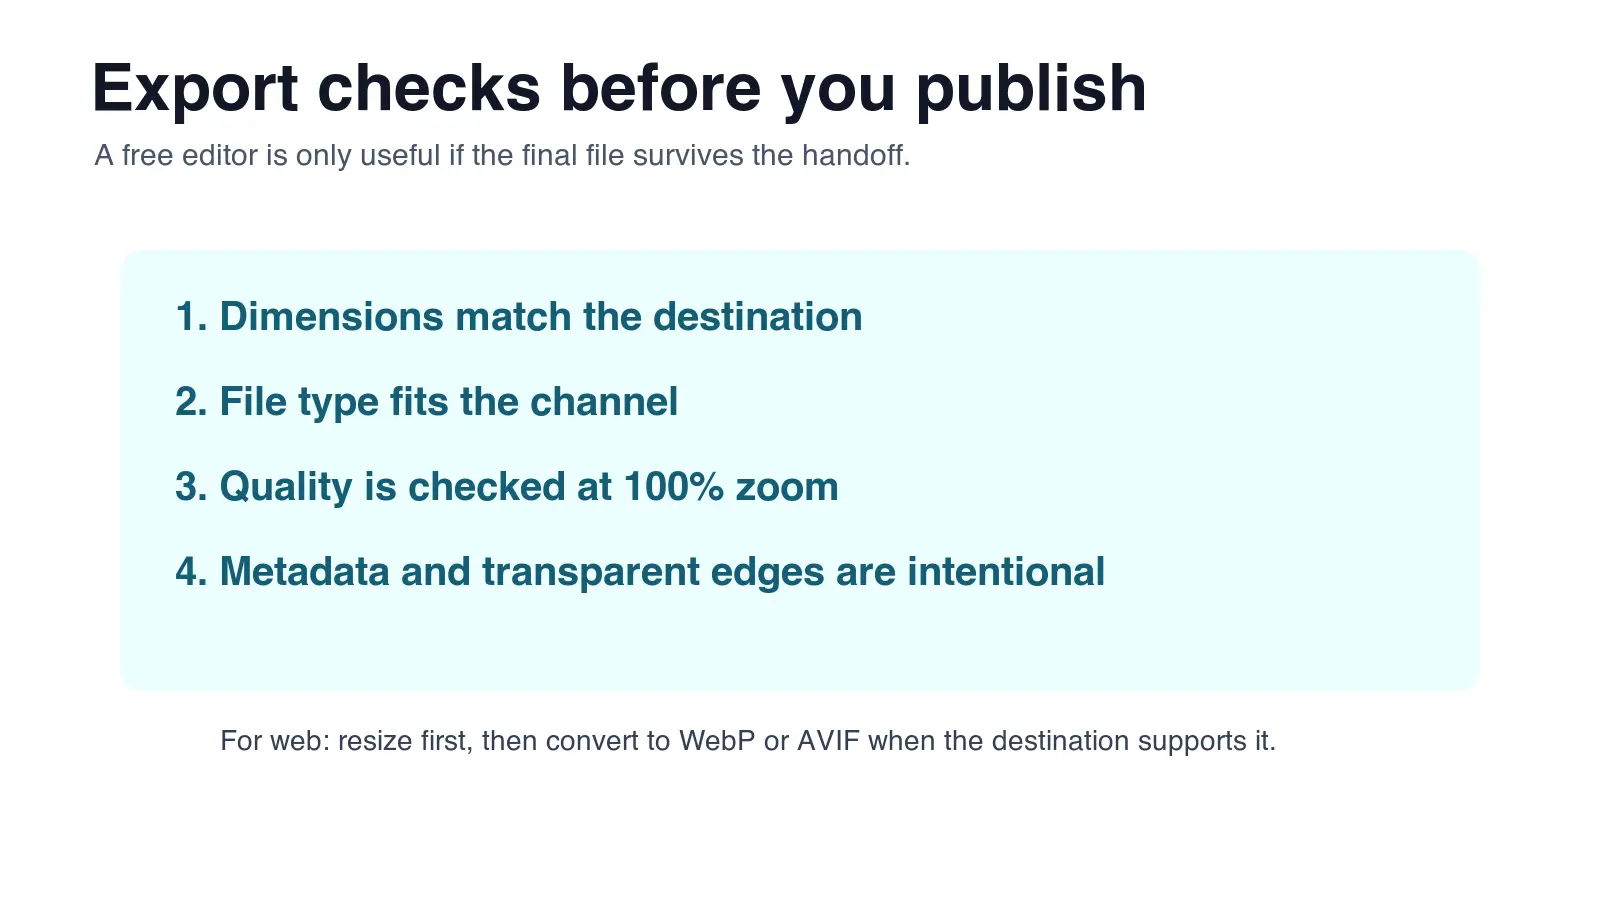
| Check | Why it matters | Quick test |
|---|---|---|
| Dimensions | Prevents blur, rejection, or slow pages | Compare pixel size against the destination requirement |
| File size | Affects upload limits and page speed | Compress after resizing, not before |
| Format | Controls transparency, animation, and compatibility | Use PNG/WebP for transparency, JPEG for broad compatibility |
| Watermark or paid asset | Can make the file unusable commercially | Inspect the export screen before final download |
| Edge quality | Background tools can leave halos | View at 100% on both dark and light backgrounds |
| Color accuracy | Auto-enhance can shift products | Compare beside the untouched original |
For product photos, I keep a plain checklist: exact size, clean edge, no watermark, no fake color, and file size under the platform limit. That catches more issues than chasing a perfect editor.
A practical free workflow for real projects
Use a stack instead of forcing one tool to do every job. Here is a sensible workflow for common cases.
For a blog image:
- Crop and resize in Imagic AI or Squoosh.
- Compress as WebP.
- Check the file in the browser at the final display width.
- Add descriptive alt text before publishing.
For a product photo:
- Save the untouched original.
- Remove the background with Remove.bg or Imagic AI.
- Clean edges in Photopea or GIMP if needed.
- Resize to the marketplace requirement.
- Export JPEG or WebP based on the upload rules.
For a social graphic:
- Start with a Canva or Pixlr layout.
- Use only free assets you can export.
- Download at the platform size.
- Compress only if the platform or page speed needs it.
For a logo cleanup:
- Start with the highest-resolution raster file available.
- Try Vectorizer.ai on a copy.
- Inspect curves, corners, and text shapes.
- Keep SVG for design work and PNG/WebP for publishing.
Common mistakes with free image tools
-
Editing the only copy. Always keep an untouched source file.
-
Compressing before resizing. Remove extra pixels first.
-
Trusting one-click enhance. Product colors can drift.
-
Ignoring export limits. Free plans may reduce resolution or block assets.
-
Using WebP everywhere without checking support. Some email and legacy upload systems still expect JPEG or PNG.
-
Publishing background cutouts without edge checks. Halos show up on dark themes and marketplace cards.
-
Picking a template tool for PSD repair. Use Photopea or GIMP when layers matter.
-
Picking a pro editor for a one-minute crop. Use a simpler browser utility when speed matters.
-
Forgetting alt text. Search engines and assistive technology need a useful description.
-
Deleting the working file too soon. Keep the editable file until the campaign or listing is live.
Final recommendation
Use Imagic AI as the everyday utility, Photopea when layers matter, Canva Free when layout matters, Squoosh or TinyPNG when bytes matter, and GIMP when local control matters.
That stack covers most unpaid image work without pretending one free tool does everything. The important habit is the export check: dimensions, format, quality, watermark, and edge quality before the file goes live.
Frequently asked questions
What is the best free image tool for most people?
For most everyday tasks, Imagic AI covers resizing, cropping, compressing, converting, upscaling, and background removal in one browser workflow.
Which free tool should I use to edit a PSD file online?
Photopea is the best free browser option for PSDs, layered mockups, masks, and adjustment layers.
Which free tool is best for compressing images for the web?
Squoosh or TinyPNG both compress images well, with Squoosh adding a side-by-side quality preview before you save.
Which free tool removes backgrounds from photos?
Remove.bg is fastest for portraits and clear-subject product photos, while Imagic AI handles quick background cleanup in a browser workflow.
Which free tool is best for social media graphics?
Canva Free is the strongest choice for social posts, thumbnails, and simple ads because of its templates and quick exports.
Should you compress an image before or after resizing it?
Resize first, then compress, since compressing an oversized file still ships more pixels than the destination needs.
Which free tool turns a logo into a vector file?
Vectorizer.ai converts a clean raster logo or icon into a scalable vector-style file, though it struggles with detailed photographs.
Is GIMP a better choice than browser-based free editors?
GIMP is the better pick for offline, layer-heavy editing or when you cannot upload images to a web tool, but it has a steeper learning curve than template-based tools.
Image credits
- Cover, decision map, comparison table, and export checklist generated by the author for this article to summarize free image tool workflows and export checks.
Use the free tools while you follow the guide.
Keep reading
2026-09-13
How to Blur Faces and License Plates Before You Post
Blur or pixelate faces and license plates so they stay unreadable. Which method actually anonymizes, what fails, and how to avoid leaking EXIF location data.
2026-08-27
Invisible Watermarks: What Image Files Now Carry in 2026
Paint embeds a server-issued GUID in AI images, platforms strip C2PA manifests, and a plain WebP export drops all of it. What your files really carry, and how to check.

2026-07-28
Batch Image Processing: Pipeline Order, Settings, and Tools
Batch image processing runs resize, compress, and convert jobs across whole folders. The pipeline order, measured quality settings, tool choice, and automation.