2026-03-28 · Updated 2026-07-12
AI Image Outpainting: Extend Photos Without Artifacts
Learn when AI image outpainting works, how to set prompts and masks, clean up edges, choose aspect ratios, handle rights, and export final images.
Last updated: July 12, 2026
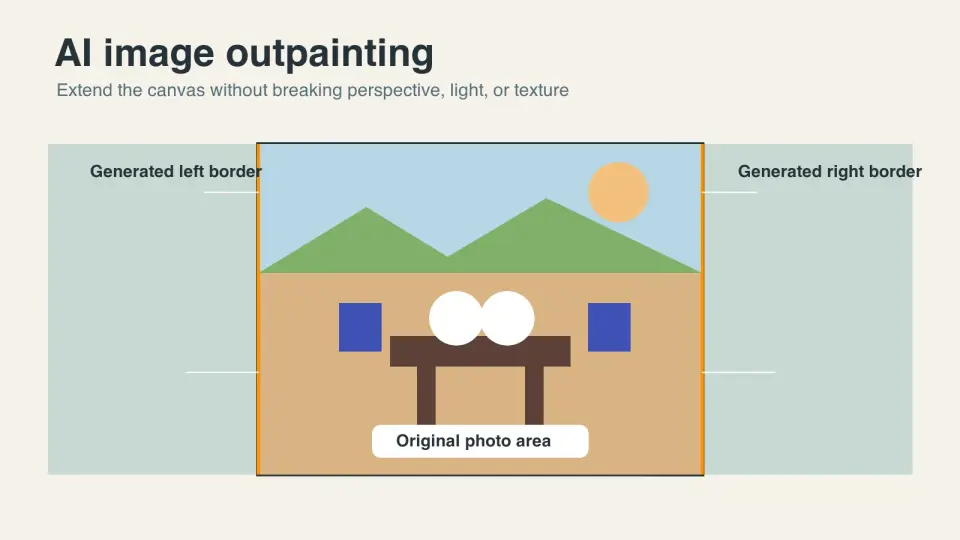
AI image outpainting extends the canvas beyond the original photo, then fills the new border with generated pixels that match the scene. It is useful when a good image is framed too tightly, the crop does not fit a layout, or a product photo needs more negative space for copy. It is less reliable when the missing area must contain exact anatomy, brand marks, readable text, or legally important details.
Quick answer: how do you outpaint an image well?
Start by choosing the final aspect ratio, not by generating random extra space. Add canvas only where the finished design needs it: a 16:9 hero, a 1:1 marketplace square, a 9:16 story, or a print bleed. Leave 10-25 percent of the real image visible near the new edge so the model has texture, light, and perspective to continue.
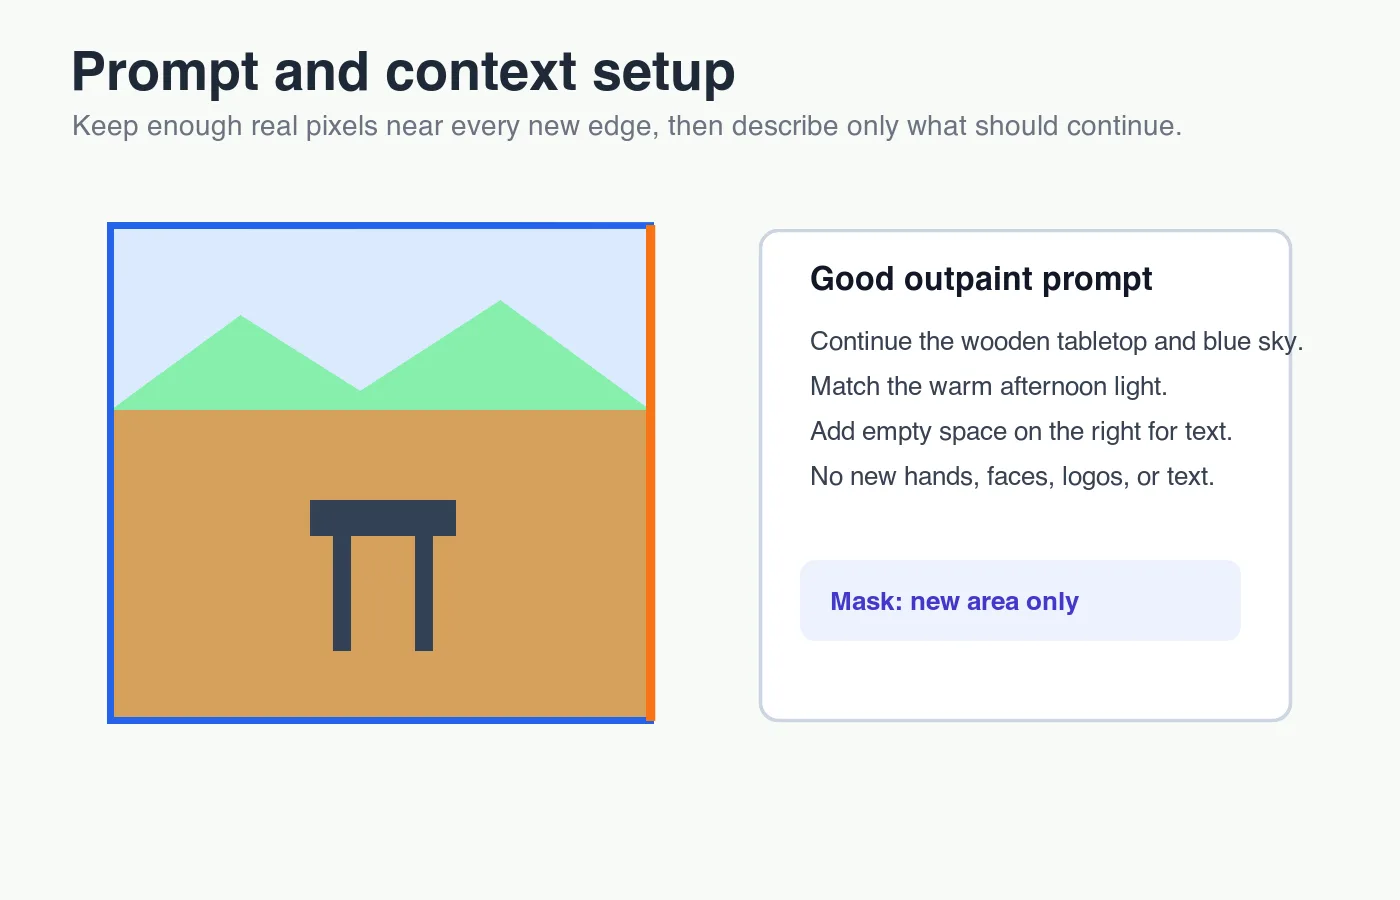
Use a short prompt that describes continuation, not a new scene. For example: "continue the wooden tabletop and soft window light to the right, empty background, no text, no people." Generate in small passes, inspect the seam at 100 percent, then repair artifacts with a tighter mask.
For commercial use, keep the original rights clear, avoid adding protected logos or recognizable people without permission, disclose AI-generated edits when your platform or client requires it, and export a web-ready format after the final crop.
When should you use AI image outpainting?
Outpainting works best when the model can infer a continuation from visible evidence. Backgrounds, skies, studio paper, tabletops, walls, landscapes, and soft bokeh are forgiving. Product edges, human hands, typography, watches, jewelry, architecture, and repeated patterns need more checking.
Use outpainting for:
- Expanding a product photo from square to a wide website hero.
- Adding safe space around a portrait for a YouTube thumbnail.
- Turning a vertical travel photo into a 16:9 presentation slide.
- Creating ad variants from one approved source image.
- Adding bleed around a print design before final cropping.
- Recovering a tight crop where the subject is too close to the edge.
Do not use outpainting as evidence reconstruction. If a real object was outside the camera frame, the generated border is a plausible guess, not a record of what existed. For editorial, legal, medical, real estate, and marketplace inspection images, label or avoid generated extensions when they could mislead the viewer.
| Source image | Outpainting difficulty | Practical note |
|---|---|---|
| Plain studio background | Low | Usually one pass plus seam check |
| Sky, grass, sand, water | Low to medium | Watch for repeated texture blocks |
| Product on a table | Medium | Keep product untouched and extend only background |
| Portrait shoulders or hair | Medium to high | Mask carefully; anatomy errors are common |
| Text, labels, logos, UI | High | Do not ask the model to invent exact text |
| Crowds, hands, jewelry | High | Small errors become obvious fast |
If the image mainly needs a new crop, use an image aspect ratio changer first. Outpainting is for missing canvas, not routine cropping.
How do you set up the canvas, mask, and prompt?
Use this order when preparing an outpaint:
- Duplicate the original and keep it unchanged.
- Decide the final destination: hero, listing, social post, print, or banner.
- Expand the canvas to the final ratio, or slightly larger if you need bleed.
- Lock or avoid masking the subject, product, face, logo, and readable text.
- Mask only the new blank area plus a narrow overlap into the real image.
- Write a prompt that continues material, light, camera angle, and empty space.
- Generate two to four variations, then pick the one with the least repair work.
- Zoom to 100 percent and check seams, shadows, perspective, and repeated texture.
A good prompt is usually specific but boring. It should tell the model what to continue and what to avoid. "Extend the beige studio paper background to the left, match softbox shadow direction, keep the product untouched, no text, no new objects" is stronger than "make this image beautiful and professional."
Bad prompts often introduce new subjects because they describe a scene instead of a continuation. If you write "modern kitchen with plants and sunlight," the model may add plants, cups, cabinets, or windows that were never in the original. If you write "continue the existing white kitchen wall and countertop, soft daylight from left, empty space," the instruction stays closer to the actual border.
For product work, pair this with a controlled AI product photo generator workflow only after the source image is approved. Do not let outpainting modify the product itself unless the assignment is explicitly conceptual.
What prompt details make the extension believable?
Outpainting fails when the new pixels contradict the old pixels. Prompt the boring physical facts first:
- Material: paper sweep, painted wall, linen fabric, asphalt, wood grain, grass.
- Lighting: soft window light from left, hard noon sun, overcast sky, studio flash.
- Camera: shallow depth of field, wide angle, straight-on product shot, overhead view.
- Composition: empty negative space on right, continue floor line, keep horizon level.
- Exclusions: no text, no logos, no extra people, no new products, no cropped hands.
| Prompt component | Better wording | Why it helps |
|---|---|---|
| Continuation | "continue the marble countertop to the right" | Names the thing that crosses the edge |
| Light | "match warm window light from the left" | Reduces shadow direction changes |
| Space | "leave empty space for headline copy" | Avoids clutter in ad layouts |
| Constraint | "keep the bottle unchanged" | Protects the subject from accidental edits |
| Exclusion | "no labels, no text, no new objects" | Prevents hallucinated details |
For the figures in this article, I generated simple measured diagrams instead of stock photos because outpainting is easier to understand when the seam, mask, and target ratio are visible. The same rule applies to your own work: make the invisible setup visible before you judge the final image.
How do you clean up seams and artifacts?
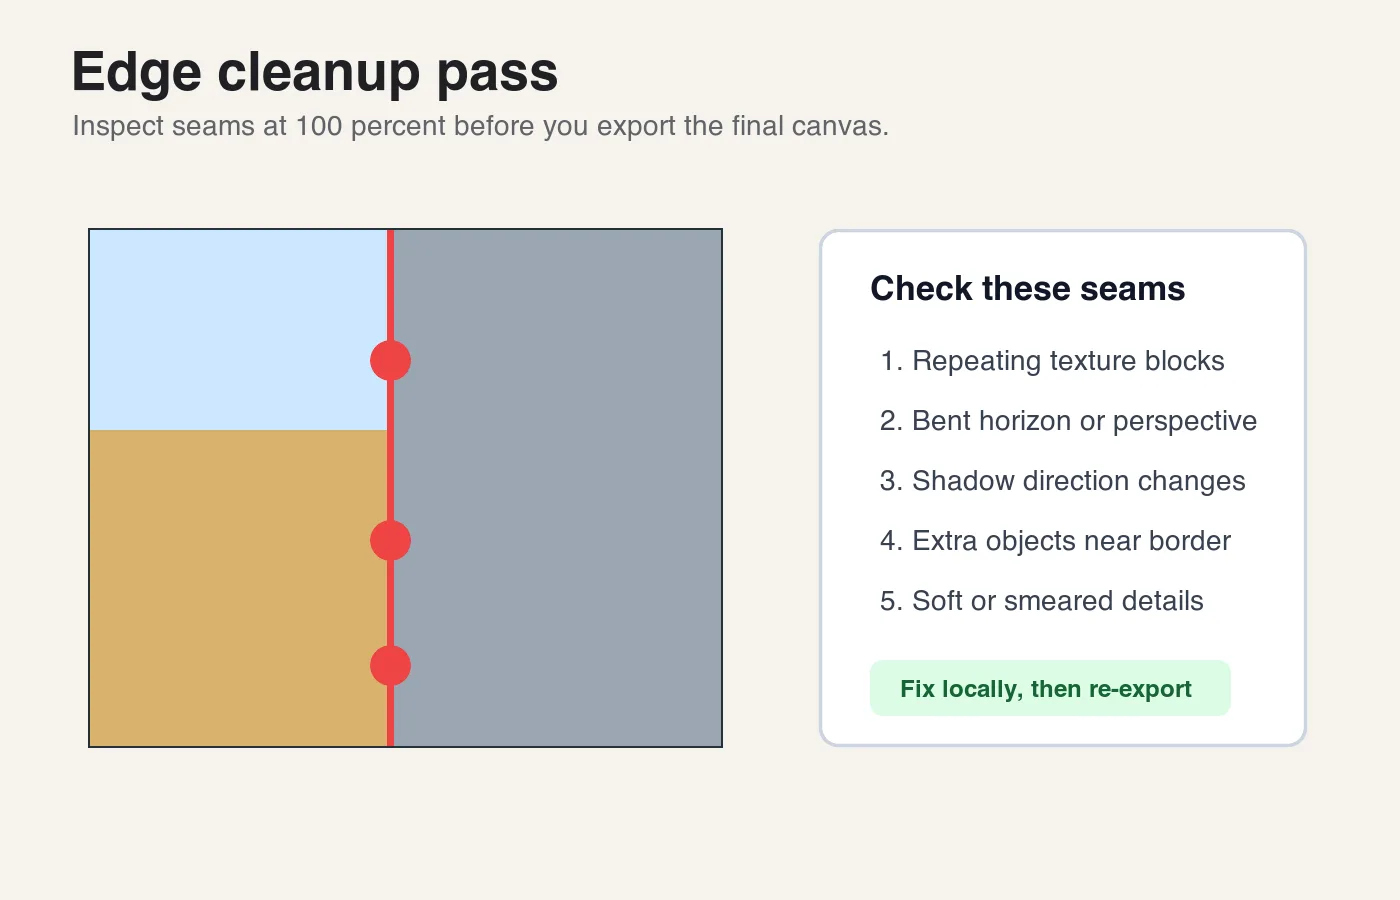
Most outpainted images need one local repair pass. The first generation gives you a direction; the cleanup pass makes it usable. Zoom to 100 percent, pan along the boundary between real and generated pixels, and look for changes that a viewer will read as fake.
Check these areas before export:
- A horizon or tabletop line that bends at the seam.
- A repeated grass, fabric, cloud, or tile pattern.
- Shadows that change direction or softness.
- Background blur that suddenly becomes sharp.
- Extra fingers, faces, wires, handles, or reflections.
- Text-like marks that look almost readable.
- Product edges that have been softened or reshaped.
- Color temperature shifts between original and generated pixels.
Repair with the smallest mask that solves the problem. If a seam line is visible, mask a thin strip around it and prompt for "blend the existing texture across the edge." If a generated object appeared near the border, mask only that object and ask for empty background. If perspective is wrong, it is often faster to regenerate from the previous step than to patch every line.
For image-quality cleanup after the canvas is correct, see AI image editing. For file size and delivery checks, use the complete image optimization checklist.
Which aspect ratios should you outpaint for?
The right ratio depends on where the image will appear. Outpainting after every crop wastes time because each new edge may need cleanup. Plan the final sizes first, then generate the missing canvas once.
| Destination | Common ratio | Outpainting direction | Extra caution |
|---|---|---|---|
| Website hero | 16:9 or 21:9 | Left/right, sometimes top | Keep subject away from nav and text |
| Product listing | 1:1 | Add sides or top/bottom evenly | Do not alter product shape or label |
| Instagram feed | 4:5 or 1:1 | Usually top/bottom | Leave safe margins for interface crop |
| Stories/Reels | 9:16 | Top and bottom | Avoid important details near edges |
| Print bleed | Final trim plus bleed | All sides | Keep generated pixels outside critical content |
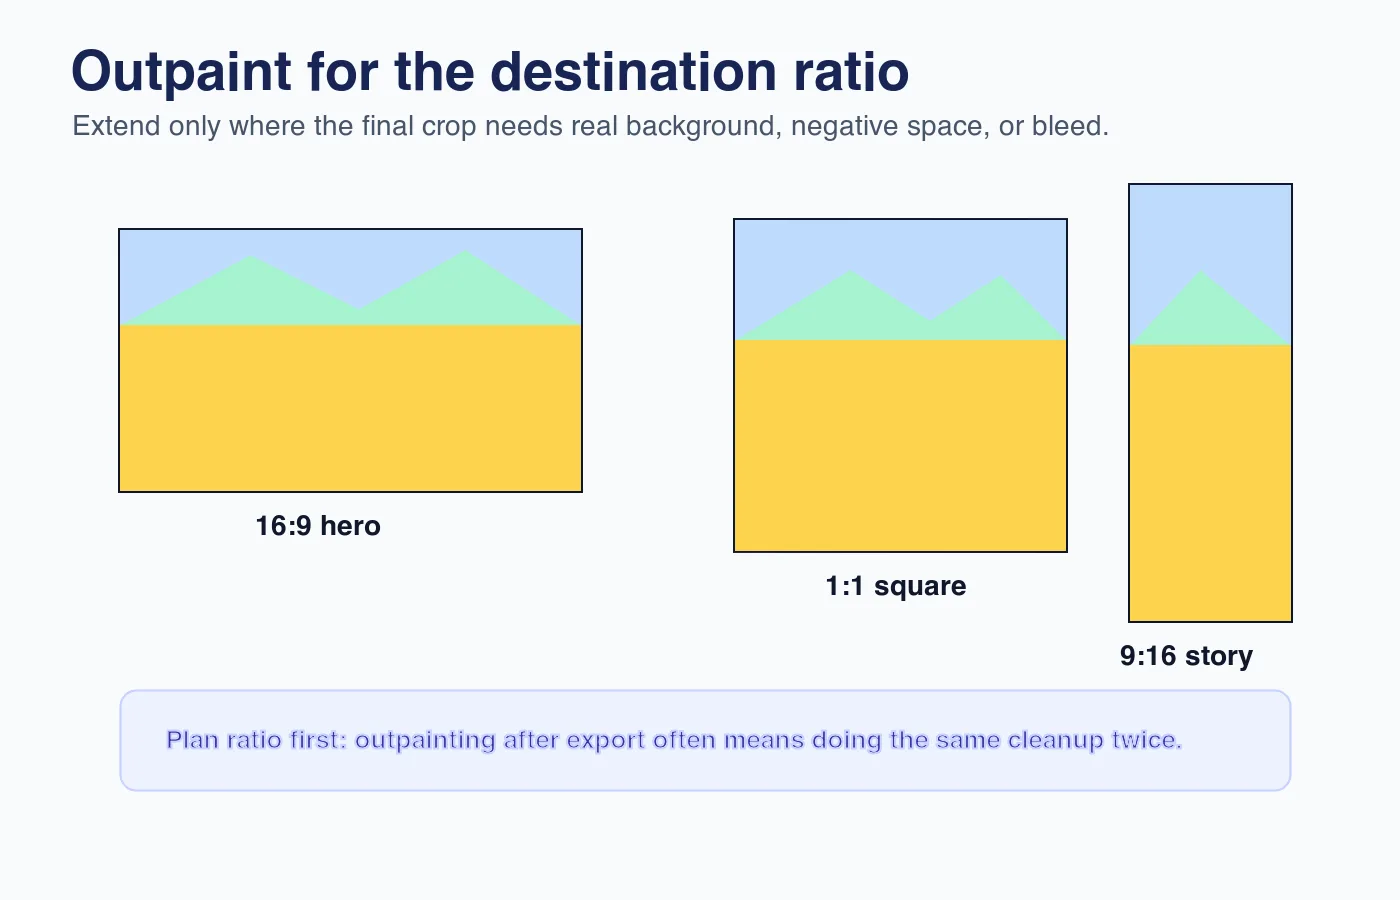
If you need multiple derivatives, create the largest clean master first. Then crop down into smaller formats and export each version. That keeps artifacts out of the high-value master and avoids compounding compression. The batch resize guide is useful after the outpainted master is approved.
What rights and disclosure issues should you check?
Outpainting changes the image, but it does not erase the rights attached to the original. If the source photo is licensed, follow that license. If it contains a recognizable person, private property, artwork, logos, or branded packaging, treat the generated border as part of the same commercial-use review.
The U.S. Copyright Office maintains official guidance on copyright and artificial intelligence, including the human authorship issue around AI-generated material. Adobe also documents Content Credentials, a practical way to attach provenance and edit history where supported. For search visibility and image delivery, Google's image SEO guidance recommends descriptive context and accessible image information in Google Images best practices.
Use this checklist before publishing:
- Confirm you have rights to the original photo.
- Save the original file and the edited master separately.
- Do not generate fake logos, labels, signatures, license plates, or documents.
- Add disclosure when the image is used in editorial, political, medical, legal, or product-proof contexts.
- Keep Content Credentials or similar provenance metadata when your workflow supports it.
- Tell clients which parts of the image were extended if approval depends on accuracy.
For ecommerce, be strict. A generated tabletop extension is usually fine; a generated product edge is not. Buyers should be able to trust the item they inspect. The same caution applies to ecommerce product photography.
How should you export an outpainted image?
Export only after the composition, seams, and rights checks are done. Save a layered or editable master if your tool supports it, then export flattened delivery files.
For web pages, use WebP or AVIF when your publishing system supports them; MDN's image file type guide is a useful reference for browser image formats. Use sRGB color, resize to the actual display range, and compress after the final crop. Do not repeatedly export, re-open, and re-compress the same image.
Basic export settings:
- Master: full size, layered when possible, kept with the original.
- Web hero: WebP, sRGB, 1600-2400 px wide for most layouts.
- Social: platform ratio, sRGB, enough resolution for retina displays.
- Print: ask the printer for size, bleed, profile, and preferred format.
- Archive: original plus final master plus exported derivatives.
If you are changing format as part of publishing, the convert image format guide covers common JPG, PNG, WebP, and AVIF trade-offs.
Summary: a practical outpainting workflow
AI image outpainting is a canvas-extension tool, not a truth-restoration tool. It is strongest when it continues simple backgrounds and weakest when it invents exact objects, text, anatomy, or brand details.
Use this workflow: choose the destination ratio, protect the subject, mask only the new area with a small overlap, prompt for physical continuation, generate a few versions, repair seams locally, check rights and disclosure, then export from a clean master. If the generated border changes what the image appears to prove, disclose it or choose a different source image.
Frequently asked questions
What is AI image outpainting?
AI image outpainting extends a photo's canvas beyond its original edges by generating new pixels that match the scene's material, light, and perspective.
How much of the original image should I leave visible before outpainting?
Leave 10-25 percent of the real image visible near the new edge so the model has enough texture and light to continue the scene believably.
What images are easiest to outpaint successfully?
Plain backgrounds such as studio paper, skies, grass, water, and soft bokeh are the easiest because the model only needs to infer a simple continuation.
What images are hardest to outpaint successfully?
Product edges, hands, jewelry, architecture, and readable text or logos are the hardest because small generation errors become obvious fast.
Should I mask the entire image or just the new area?
Mask only the new blank canvas plus a narrow overlap into the real image, and lock or avoid masking the subject, product, face, logo, or text.
How many outpaint variations should I generate before picking one?
Generate two to four variations per pass and choose the one that needs the least seam or artifact repair.
Do I need to disclose that an image was outpainted?
Yes, add disclosure when the extended image appears in editorial, political, medical, legal, or product-proof contexts where the generated border could mislead a viewer.
What file format should I export an outpainted image in?
Export a web-ready WebP or AVIF file in sRGB, sized to roughly 1600-2400 pixels wide for most website hero placements.
Use the free tools while you follow the guide.
Keep reading
2026-07-28
AI Action Figure Trend: How to Prep Your Photo Right
Turn a photo into a collectible toy portrait: what makes the prompt work, and the crop, background, and resolution steps that avoid an obvious fake.
2026-07-26
AI Anime Generator Guide: Prompts, Styles, and Safe Exports
A practical AI anime generator workflow for portraits, avatars, banners, and social posts, with prompt templates, style checks, and export rules.
2026-07-26
Text-to-Image AI in 2026: How Prompt Generation Actually Works
Text-to-image AI turns a written prompt into a finished picture. Here is how the models, prompts, and settings behind image generation fit together in 2026.